2022-05-04

Opening Day Raft-Up

Tyee Yacht Club raft up. We are the third boat from the left...the small one.

Only three days after making our way down from Anacortes, we headed back out to join Tyee Yacht Club's raft-up at the Montlake Cut for Opening Day. We tied up with 13 other boats (two more joined after the photo was taken) just north of Marsh Island at the Seattle Arboretum for five days. Opening Day is the official start of Seattle's boating season. On the north side of the cut is a log boom where hundreds of boats tie up. We tied up on the south side where only the yacht clubs get to tie up. Pot luck dinners, drink, and other events happen on the boats.

It was cold and rainy most of the days, but brightened up just in time for the boat parade down the cut.

2022-04-29

The Voyage South

We began our adventure travelling south toward are new slip in Kenmore. Our slip became available on May First, so although we could be faster we decided to take advantage of our time. We headed down the west side of Whidbey Island and across the eastern end of the Strait of Juan de Fuca. This area can be extremely rough if the conditions are not good, but on this day, the weather was perfect. The water was glassy. The boat was running well.

The worst seas we saw the entire trip

We pulled into Tyee Yacht Club's virtual outstation at Port Hadlock. It's called a virtual outstation because there are no dedicated docks for the club, but they will do their best to fit you in. We got a slip on their newly refurbished dock. They have done a great job upgrading the docks. New LED lighting, new power stations, and a pump-out at every two slips. Using our club membership, the cost was free!

The next morning we headed down to Tyee West Outstation at Eagle Harbor on Bainbridge Island. We joined 20 other boats for the 75th anniversary of the club. We rafted to another boat for the night and joined the pot luck that night.

Headed through the small lock

The next morning we headed off toward our dock. We have to come in through the Hiram Chittenden locks into the Lake Washington Ship Canal. Our friends that we were tied to at the outstation were right in front of us. After getting through the locks, we had the privilege of screwing up all of Seattle traffic as we made them open four of the bridges as we move through the canal. On the 22, the only bridge we needed opened was the Fremont bridge, and even then, it's only by inches. With the 320, we need them all open as most have 45 feet of clearance, and our mast is 50 feet with the antenna.

Raising the bridges

We finally got to our dock, only to find it still occupied. We tied up in temporary space and made a few calls to the after hours number for the harbormaster. Some people eventually came out and moved the boat and we could pull into our slip for the next year. The advantage of this slip is that it is five minutes from our house, so coming down and working on the boat is easy and we can go out for evening sails easily.

The weather window was just perfect, which was really good because we were sailing on a schedule. You never want to be sailing on a schedule! The weather sucked before and it sucked after, but we had three days of sunshine and calm seas.

2022-04-25

Achernar

We have renamed our Catalina 320 to Achernar. Achernar is pronounced ay-ker-nar, with a long A sound. It's name comes from Arabic, which means End of the River. It is named for the last star in the constellation Eridanus, which is the River constallation. As a .5 magnitude star, it is the ninth brightest star in the sky. Because it is a southern star, it is currently visible only below 33°N, a little south of Los Angeles. It is a blue star, and is currently the flattest known star in the Milky Way, spinning so fast that its equatorial diameter is 35% greater than its polar diameter. Eridanus is a river of stars that heads south from near Orion's left foot. It ends at Achernar, the end of the river.

The boat name shows the stars of Eridanus, meticulously recreated in software by a program Greg wrote. The font is Decotura ICG, the same font we used for the name on Fantasia.

Achernar shows up in popular culture in several contexts. It was Jack Vance's favorite star. It showed up in many of his works, but particularly in The Dying Earth, the creature Firx came from Achernar. In the Star Trek universe, the planet Romulus, home world of the Romulans, circles Achernar. Vulcan is also in Eridanus. Our theme song is Achernar, by Carlo Whale.

2022-04-24

Dripless Shaft Seal Installation

We began our trip moving the boat from Anacortes to Kenmore. The first step, though, was to take the boat out for some upgrades. We motored from Cap Sante Marina to Skyline Marine Center on the other side of the peninsula. It's only about 4 miles on land, but about 12 nm by sea. It took us about two hours. We backed into a dock using our new docking skills, then got hauled our and placed on the hard at their DYI yard. There, Fathom Marine installed our new dripless shaft seal.

Boats of this generation come with a packing gland. This is the material that keeps water coming into the boat around the propeller shaft where it enters the boat. Except a packing gland has to let some water into the boat, because it also acts as the lubricant, keeping the shaft from overheating. This puts a constant amount of water in the bilge. This means the boat always has moisture in it, which leads to mildew and other problems if not controlled. A dripless shaft seal uses a different mechanism for lubrication, meaning that no water needs to enter the boat from the shaft. They are not terribly expensive, but there is the labor and the boat must be hauled out.

While doing our docking training, we noticed the transmission was having quite a bit of trouble going into gear. Eventually, we discovered that the idle was set too low for our Perkins engine. The correct idle was buried in the Perkins manual. When bumped up to 1000 RPM everything worked just fine. This is faster than most engines, but the transmission just does not work at a slower idle.

Adding our new boat logos

While the boat was hauled out, we took the opportunity to lubricate all of the thru-hole valves. We also removed the remaining boat name, home port, and Washington State ID number. Our boat is Coast Guard Documented now, so should no longer have those numbers on the bow. We then added the new boat name and home port.

The boat was then dropped back in the water. We took advantage of our reciprocal moorage with Flounder Bay Yacht Club to stay there at Skyline for two nights, while we got all our ducks in a row for the voyage south.

2022-04-17

Docking and Maneuvering Training

We decided we needed some additional training on docking. On the 22, docking is not terribly difficult. Greg could stop the boat just by holding the bow pulpit or stanchion. But with the 320, trying to stop a 11,700 pound boat under diesel power just doesn't work the same way.

Shearwater University is a US Sailing instructional group run out of Cap Sante Marina in Anacortes. Their slip for Ardenna, their sail boat, was only about 40 feet from our slip. We ran into them several times while doing work on our boat. They do training on your boat, if you like. So we contracted to have Mark go out with us and give us some docking and maneuvering training. The night before, we had them help us get the boat turned around and moved to an easier slip to get into and out of.

The morning of our training we went to Fisheries Supply and West Marine and bought two Shaefer mid rail cleats and two 5/8" 35' docking lines (later adding two more). The mid rail cleats slide onto the 1.25" tracks, which takes no effort at all to install. Although the cleats were expensive, when you factor in time to install permanent cleats, they were cheap.

Shearwater teaches a single line docking technique. It's pretty slick. It's designed for having one pilot and one crew. It needs to be modified a bit for different conditions, depending on the wind direction and whether launching forward or toward the aft, and which side your prop walk takes you. For launching, essentially the scheme is to have the engine push against a single spring line at midship that is looped around the cleat and back to the mid rail cleat. Then all the other lines can be removed. With the wheel turned, that one line will pull the boat into the dock. The mate comes on board. The boat can then be put into neutral, the spring line untied, the boat put into gear, the spring line unlooped from the dock and you are underway.

Coming in, the mate goes onto the dock with the spring line. It is looped around a cleat but not locked. When the boat is at the right place on dock, it is placed into neutral. The spring line is locked. The wheel is turned and placed in gear at idle speed. The boat sucks right into dock and held in place by the single spring line. Now at leisure the entire boat can be made secure with forward and stern lines. Then the engine is shut off.

Docking with these techniques is so much less stressful. We put it to use immediately and with just a little practice it is working very well. There is only one step in docking and launching that has to be timed well, which is getting the spring line on and off the cleat. The rest can be done at leisure. Nobody is jumping on to a boat that is leaving the dock, which is much safer.

2022-04-02

Out for a Test Sail

We took the 320 out for a test sail from Cap Sante Marina in Anacortes. The dock we were on is tricky, as it is in a narrow channel that is affected by the tides and there were other boats on the parallel dock. Still, Sandi took her out smoothly. We got her out in the bay. After testing motoring for a bit, we noticed the transmission was not quite reacting the way we'd like, being stiff and not wanting to go into gear. We brought out the jib, and shut the motor off. On the first tack, the jib knocked one of the spreader boots off, which landed on deck. Our rigger had said they were old, but thought they'd last the season. The spreader boot acts as a cap on the end of the spreader that keeps the sail from getting snagged and ripping. It's kind of important to have.

Underway for the first time since the sea trial

We decided not to bring the main out, partly because we had the Dutchman system only partly connected. We still needed the backstay for that, which we had on order. The Dutchman is an interesting alternative to lazy jacks. There is a filament that is threaded through the sail that goes from the bottom to the back stay fastened from a halyard at the top of the mast to the end of the boom. The filament attaches at two places on the backstay. When the sail is dropped, it flakes itself on the filaments. This Dutchman was original to the boat, but the filaments were broken and the backstay was nowhere to be found on the boat. We had taken the sail into Doyle sails in Seattle. They replaced the filaments, as well as adding a second reefing point and replacing the slugs that hold the sail to the mast. Four of the slugs were broken when we bought the boat, but they all needed to be replaced.

After being out for a short time, Sandi expertly piloted her back into our dock.

In the next several days, our rigger, Kent Morrow of North Sound Rigging, went up the mast and replaced all of the spreader boots. He also replaced all of the lifelines that were at end of life.

2022-04-01

Boat Maintenance

We took our Catalina 320, currently named Skål, out for our first time away from the dock since the sea trial. We will get to that in another post, but we've been busy for the last six weeks. We have had engine maintenance, sail maintenance, and other general work to get her ready to go. Our first issue was getting her insured. We went back to BoatUS, who has been our insurance company on Fantasia. They looked at the survey that had been done, picked what seems like an arbitrary four things that had to be fixed before they would insure the boat. Not only did we have to fix them, but we had to have our surveyor come back out and verify they were fixed. So we did.

Out of the things on the survey, they decided that we had to replace the exhaust hose, fix the bilge pump hose, stop a really minor deck leak of the port mid-ship stanchion, and put some chafe guard on some engine water hoses. Other things like a dead carbon monoxide detector didn't matter to them, which I'll come back to in a bit. The exhaust hose was at end of life, but really didn't need replacing before insuring the boat. But fine. We got 20 feet of exhaust hose (we needed maybe 12) and replaced it. We rebedded the stanchion, which was relatively easy except getting access to the nuts inside the boat was tricky. The chafe guard on the hoses took minutes to fix. The bilge pump hose had a minor split that needed repair, which we did. We would have got to all of these, but probably with a different priority if the underwriters hadn't chosen the priority for us. We could have chosen a different insurance company, but we were going to fix them anyway.

The mainsail was missing four of the slugs that hold it to the mast. So we took it in to Doyle Sails and had them fix that, as well as add a second reefing point on the sail. We also had the Dutchman system on the sail repaired as the filaments were broken. The gate that allows you to remove the mailsail from the mast was installed with non-stainless screws, which had rusted and caused their heads to break off. We had to drill them out and re-tap them. Do not use hardware that isn't stainless on a sailboat!

The Perkins M30 engine the boat comes with was running rough, so we had Darrel at Fathom Marine Services do some overdue maintenance. The M30 has a notorious problem that the exhaust elbow part gets clogged with carbonization. Sure enough, it was bad enough that the part had to be scrapped and a new one ordered from England and expedited out. (If you have an M30, get the elbow checked!) We got all the fluids changed, the timing on the engine fixed, and the idle changed, replaced the impeller, etc.

We had Kent from North Sound Rigging come out and do a rigging inspection. He mainly noted that our standing rigging and lifelines are at end of life. You are supposed to replace the standing rigging every ten years, and ours are 28 years old. Still, there was nothing that looked terribly wrong, so we are scheduling that for this fall. The lifelines, though, will get replaced earlier. He also noted that the shroud boots needed replacing, two cam cleats on the traveler was dead (we had already noted that and replaced them with new Harken cleats before he gave us the report), and a few other items. Basically we need standard rigging maintenance, but nothing that said don't sail.

We could have had the rigging inspection required before buying the boat, but we didn't feel that anything he would have to say would change what we decided on the boat, just what items were on the list.

We replaced a bunch of outdated or dead safety stuff on the boat. The flares were from the 1990s. The fire extinguishers were old, too, and certainly don't meet the new Coast Guard specs that come into play this month. We replaced those. We replaced the dead carbon monoxide detector in the salon with a new Kidde smoke and carbon monoxide detector. We added a second one to the aft cabin where there had never been one. We replaced the dead GFCI AC sockets. Why weren't these things weren't important to the underwriters?

We replaced all of the interior incandescent lights with new LED lights that are both brighter and use less battery. We added labels to the electrical panel. We added a wire tie to the macerator to make it so it can't be opened in the Salish Sea. We fixed the handle on the head door. We replaced the wing nuts on the battery terminals with regular nuts, and found one of the battery terminals had cracked, so replaced that. We topped off the water in the batteries. We added Froli bed springs to the bed in the aft cabin. We replaced the cover to where the emergency tiller attaches because the handle was broken.

As noted on the survey, the drain on the propane locker was clogged. This is important because it is the exit point from the boat if the propane tank leaks. You don't want propane on a boat because it tends to go boom! Except you need propane on a boat to run the stove. So you isolate it and make sure that any leaks go overboard rather than sinking into the bilge where a spark causes bad things to happen. A clogged hose leaves propane on the boat. We replaced that hose (43" of 1" hose), also finding that there was a screen placed at the end of the hose to keep bugs out that had been completely clogged with debris. We removed that screen.

We have an Ardic diesel heater on the boat. The unit is in the starboard aft lazerette. This pumps out a ton of heat. Unfortunately, there seems to be a leak in the exhaust, because it caused the brand new carbon monoxide detector to go off at 1 a.m. If we hadn't installed that in the aft cabin, it literally could have killed Sandi. We have since added a third carbon monoxide detector in the lazerette next to the heater. If there is one thing the underwriters should have insisted on was new detectors. We haven't fixed the heater yet, but we aren't running it until we do. Since we are at the marina, we are using an electric heater for now.

None of these things are surprising on a boat. Every boat has a list like this, even brand new boats. (We use Microsoft To Do to maintain our lists, which allows modifying them from any device.) We just are doing all of this stuff at once rather than stretching it out. We learned so much doing work on Fantasia, our Catalina 22, that prepared us for taking on this boat.

2022-03-01

History of Our Catalina 320

Catalina Yachts of Woodland Hills California, started building Catalina 320s for the 1993 model year. Through 2008, they build over 1165 of them. In 2008, they discontinued the model and replaced it with the Catalina 315. The Catalina 320 International Organization has a history of the changes over the year and a pretty complete list of current owners with their names and home ports. From various records that came with the boat, in the closing documents, and a few other places, we have been able to find the history of the boat.

Our Catalina 320, hull #87 was built in October of 1993, as a 1994 model year for WeatherMark, Inc. a Catalina dealer in Buford Georgia. The builder's certificate was issued February 8, 1994. It was purchased by a couple on March 15, 1994 and named Rader's Folly II. Unfortunately, the husband of the couple passed away soon after and the boat was put up for sale.

On August 16, 1994, Rear Admiral Ronald P. Morse of the U.S. Navy Dental Corp bought the boat, which closed by September 17th. The boat was renamed Skål, the Scandinavian toast that means "cheers". The Coast Guard records can't do non-standard letters, so they show the name as SKAL. Admiral Morse sailed her on Chesapeake Bay. When Admiral Morse retired from the Navy in 1995, he moved to the Seattle area and had her trucked across the country.

On August 18, 1997, Skål was sold again, but retained the same name, to a couple in Washington State. Then the records get a little less clear. It appears the one of the owners died in February of 2007 and the boat was transfered again to a couple in Friday Harbor. The boat had a title issued by the State of Washington on December 5, 2008.

On January 16, 2022, we took a look at Skål at Cap Sante Marina in Anacortes. We had actually seen Skål in August when we made our San Juans trip on Fantasia and stopped at Cap Sante. There had been a pending offer from a couple from Hawaii that fell through. After looking at all the systems, we made an offer that evening, which was accepted. The sale closed on February 18, 2022. And that is how we became the fifth owner of Catalina 320 Hull #87.

2022-02-18

New Boat! This site is now the Catalina 320 Yacht's Log

Today, we received title on our new boat.

After 7 years of sailing our beloved Catalina 22', Fantasia, primarily in Lake Washington and Seattle's Puget Sound area, we ventured north to the beautiful San Juan Islands last August for the first time for a weeklong sailing adventure. "Cruising" like this is a very different experience from our day sails and evening sunset cruises. We decided pretty quickly that although we love our little Catalina 22' swing keel, we really needed a little more cabin space in which to spend days or even weeks anchored out exploring the waters of Puget sound and the greater Salish Sea. The nature of our work has changed, as it has for so many of us, in the past couple of years, and we now work primarily remotely. With this new level of freedom, we began to entertain the idea of working from on board a boat, still in the same general area, but not limited to our home offices. We began thinking about what our next boat would be, and agreed that another Catalina in the 32'-36' range would be a good fit for us and our current needs. We started keeping a watch on the boats coming up for sale in the area and eventually found one that we were both happy with, a 1994 Catalina 320, that we had actually seen last August during our San Juans trip! Originally christened 'Rader's Folly II', she's been known as 'Skål' since Admiral Ronald P. Morse purchased her in Norfolk, VA., in September of 1994. We deliberated, even agonized, over her name quite a bit and ultimately decided that the name 'Skål' wasn't a good fit for us. Her name will be changing once again, but that will be revealed another day.

We are not selling Fantasia, our Catalina 22 at the present time. We have poured so much time, effort, and money into her that we feel that selling her is just a waste. She can sit on the trailer in the driveway until we find a new home for her, perhaps with one of our young adult kids once they are ready to take her on for creating their own sailing memories.

Purchasing a Catalina 320 was an entirely different experience from purchasing our Catalina 22. With a small trailer sailor, you're likely to purchase with a walk around, a handshake, signing some paperwork and handing over some cash at a dining table. This purchase was much more like a home purchase with seller and buyer's brokers, a formal written offer, sale contingencies, a written offer acceptance, formal inspections (in boat terms, these are the survey, haul out, and sea trial), and an escrow/title company in the middle of it all. If financing your purchase, you'd also have a bank and loan documents wrapped into the process as well. As Skål was moored about a 90 minute drive from us in Anacortes, WA., we met with our buyer's broker to look at another local Catalina 320 which was already under contract, just to be able to sit on board to confirm if the size and layout 'felt' right for us. A couple of days later, we made the drive up to see Skål and spent the next few hours crawling all over her, peeking in every locker and bilge space. Overall, she was in pretty good shape for a 28 year old boat, but had plenty of opportunity for us to make her our own with some TLC and a new list of boat projects. We've joked at times that it's possible we're as addicted to sailboat projects as we are to sailing itself. But I think it's just that we get such a sense of accomplishment and pride in ownership from the maintenance and upgrade projects we take on.

So what's on the agenda for us and the new boat now?

First up we have a few critical maintenance items to take care of. We pulled the main sail off the boat and sent it off to a sail loft to have all the slugs replaced. Four of them, we knew from our initial inspection, were already broken, and the others were likely also brittle and headed towards failure. Best to just have them all done and not have to worry about them. We decided to have a 2nd reef point added to the main and to also have her Dutchman flaking system filaments replaced. This will make dropping the sail much easier to manage for us at a fraction of the cost of adding a new stack pack.

Inside, our surveyor had noticed evidence of a small freshwater deck leak from one of the stanchions. Rebedding that is a priority before it can do any damage to the deck or the interior. Next up, installing some new smoke and CO detectors, fire extinguishers, and replacing a couple of non-working interior lights. We'll also be replacing two aging engine hoses and a leaky bilge hose. The other 50+ items already on our to-do list are relatively minor things like cleaning the Magma grill, updating labels on the electrical panel, replacing wire nuts with proper electical connectors, calibrating the knotmeter (which disagreed with our GPS devices during our sea trial), fixing/replacing a cam cleat, and servicing the winches. We're super excited to be embarking on a new journey with new things to learn.

2021-09-12

Servicing the Arco 6 Winches

Our Catalina 22 came with Arco 6 winches. Once a year your winches should be cleaned and maintained. Our haven't been serviced since we got the boat seven years ago and who knows how long before that, so it was well past time. While ours are Arco 6, the info below applies to virtually any single speed winches, for example Lewmar winches.

Arco 6 Winch

A sailboat winch is actually a relatively simple device. It is essentially a ratcheted drum that only turns clockwise. It provides mechanical advantage when pulling on lines. If more advantage is needed, a winch handle can be attached to the top which makes a bigger lever giving more mechanical advantage.

The winch works by having a cast outer drum that has serrations on the inner side, and an inner main shaft that the upper part turns. Set into the inner main shaft are a set of pawls. The pawls are pivoting metal blocks that are moved by springs. The springs push the pawls into the serrations in the drum. Because the pawls are mounted at an angle, as long at the winch is turned clockwise, the serrations will push the pawls out of the way. But if the winch tries to turn counter-clockwise, the pawls will be pushed by the springs into the serrations and stop the winch from moving.

To service the winch, I followed the directions on this web site:  https://m17-375.com/2010/04/12/winch-maintenance-arco-6-style-winch/. Another web site worth looking at is the Stingy Sailor's. Also Emily & Clark's Adventure has a nice video on winch maintenance for a two-speed winch. The basic idea is you open the winch, clean out any gunk that has accumulated, replace any spring that are no longer working, grease it all back up, and put it back together. If you are working over water, it is highly recommended to make a box that goes around the winch to keep any parts from jumping into the water.

Winch Box

I started by removing the spring ring at the top that holds the winch together with two small flat blade screwdrivers. I noticed that there were springs that were sticking out, obviously not right. After removing these springs with needle nose pliers, I proceeded to remove the pawls. There are two levels to the winch: lower pawls that are attached to the part of the shaft that doesn't spin, and upper pawls that are attached to the part that does spin. On the Arco 6, there are a total of four pawls, but on a bigger winch there may be more. There are two half disks that fit between the upper pawls and the lower pawls. With the outer shell removed, these simply slide out.

The winch is designed to be serviced.There is a small indent in the upper part of the winch. By spinning the indent above the lower pawls, they can be slid up and removed. This then makes the upper pawls removable. By sliding them into the space where the lower pawls were, they can then be removed the same way. To remove the pawls, they must be pushed in, or the angle won't be right. After removing the pawls, all the parts should be cleaned in a solvent like turpentine or mineral spirits. Then the whole thing should be put back together.

Items needed to service winch, plus lots and lots of paper towels.

And that is where we ran into the first hitch. The springs on the Arco 6 were mangled and wouldn't stay on the pawls. These springs and pawls were not designed well, with little loops of spring that go over the ends of the pawls to hold them in place but pop out easily. I couldn't find replacement springs of the same design. However, the pawls of the Arco 6 can be replaced with Lewmar small winch pawls. The Lewmar pawls are a little shorter, but work just fine. The springs mount in the middle rather than the ends. Unfortunately, the kit comes with six pawls, so it will take two kits to service both winches, leaving four extra pawls. After replacing the pawls with the new pawls, the springs can be serviced in the future for almost nothing (I found one place that sells them for 15 cents each), and extra springs come with the Lewmar pawls.

Pawl from the Arco 6

I greased the movable parts and parts that come into contact with each other with Harken winch grease. The tube says to not grease the pawls. After reversing the disassembly procedure with the new pawls, the winch went back together nicely and give very nice satisfying clicks when rotating.

Cleaned winch with Lewmar pawls

2021-08-30

List of Essential Tools and Supplies for a Boat

Having worked on our boat for the last seven years, we have found that there are some essential tools that you will need to have on your boat. We created a page with the list and links to where you can buy these items. You can find it here: https://www.yachtslog.com/p/essential-tools-and-supplies-for-boat.html

2021-08-28

A Trip to the San Juans

We have wanted to take our little boat up to the San Juan islands for years. Having spent exactly one night on the boat before, this was a pretty big step for us. Our friends Boris and Mayli were planning a trip up there for late August, and asked if we wanted to join them. There was so much to do to get ready.

Besides provisioning the boat, we needed a dinghy. We bought one very cheap dinghy from Craigslist. It had leaks that we wouldn't be able to repair in time. So we bought another dinghy, a West Marine RU-250, along with a Mercury Marine 2.5 hp outboard. To inflate it, we got a electric air pump and EXP Pro 48 Lithium Ion battery pack. (The battery pack is useful for a lot of things.) To tow it, we rigged a harness that distributes the pull between the rings on the front with New England Ropes Dinghy Tow Rope.

Our RU-250 and Mercury Marine outboard.

We also needed a way to charge the batteries while at anchor. We bought a gas-powered generator. It provides a 20 amp socket that our shore power cable plugs directly into. And speaking of anchors, our little 8 pound Danforth wasn't going to keep us feeling comfortable, so we bought a Rocna 10 (10 kg, 22 lbs) anchor, 22 feet of chain, 250 feet of 3/8" line and a swivel. We also got an anchor ball. We got a radar reflector, just in case we ran into fog, so we wouldn't get run down in our tiny boat (fortunately, no fog on the trip).

Headed out, towing the dinghy.

We got everything on the boat. It got to be 2 p.m. August 22nd 2021. We debated whether it was too late to head out, but we had a schedule to meet (always a problem on a boat)! Left dock and headed out. We arrived at Langley (South Whidbey Harbor) on Whidbey Island around dusk.

We used to VHF to call into Langley for a slip, but there was no answer. The telephone number said to call on the VHF. However, coming into the marina there was a sign on a slip saying "open", so we pulled right in and tied up. We paid at the box, and got the bathroom code number from another mariner. All good! We were entertained by the seals on the dock all night that would bark at us if we passed too close, but wouldn't budge.

The next morning, we headed out. We tried to put up sails, but there wasn't enough wind, and resorted back to motoring. Up through the Swinomish channel, past La Conner, and into Anacortes Cap Sante Marina. Called on the VHF and they assigned us a 50' slip for our Catalina 22. Not sure if they misheard our LOA! It was entertaining to be next to boats that probably have cleats that cost more than our boat.

The next morning we headed out. Crossing through Guemes channel with a strong tide in our favor, we hit 9.6 knots, I think a record for a Catalina 22! We crossed Rosario Strait with no problems, around the north end of Lopez Island, and into Friday Harbor marina on San Juan island. Soon after arriving, Boris and Mayli pulled in as well.

Proof that a Catalina 22 can go 9.6 knots.

The next morning, we got showers at the Marina, refueled the five gallons of gas we'd used since the start of the trip, and headed out to Westcott Bay near the English camp of the Pig War. We sailed a bit on the way, which was gloriously good sailing. In Westcott Bay, we anchored for the first time ever! Dropped the Rocna anchor, tied the rode to the forward cleat, put it in reverse and done. That evening we set the anchor alarm and it didn't budge. Boris sent up the drone, and caught this footage of
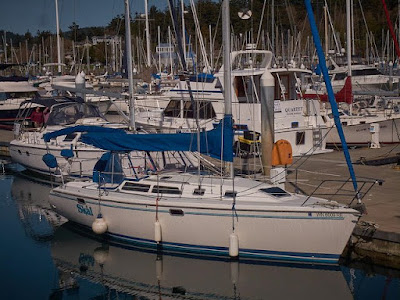
 us at anchor.

Fantasia at Westcott Bay (those are seat cushions drying on top)

We took our dinghy for a nice test ride out to the English Camp. In 1859, the United States and England had a cold war on San Juan island contesting the border between the U.S. and Canada. Both claimed the San Juan islands. Eventually, a decision was made by a neutral third party that the San Juan islands were owned by the United States and the hostilities ended with the only casualty of the war being a pig, thus the name "The Pig War".

The next day Sandi cooked pancakes on the deck for breakfast. In the afternoon, we took the dinghy around to Roche Harbor, visiting the town and the sculpture park.

Mayli at the sculpture park.

The next morning, we topped off the batteries with the generator, and headed back to Anacortes, passing between Orcas Island and Shaw Island. It was pouring rain at times. As we crossed Rosario Strait, Greg checked the bilge and discovered water, which was disconcerting as we have never had any real water in the bilge. Water seemed to be seeping in aft of the keel trough. We got to Cap Sante Marina and Greg raced over to West Marine to get some epoxy before they closed. After laying down some epoxy which slowed the ingress, we debated what to do, as sailing for another day or two with an unknown source of water seemed inadvisable.

After thinking about it, we decided to have Connie come up and get Sandi, go down and get the trailer, and bring it back. Greg stayed with boat overnight during which the water leak seem to subside. The next morning, Sandi drove up with the trailer along with Devon and Taylor. We moved the boat over to the boat lift and took down the mast. The guys at the lift took the boat out and dropped it on the trailer. And we drove it back to Kenmore. Thus ending our trip.

While this ended on a downbeat, we considered this trip a success!

Fantasia safely parked at the end of the trip.
Our route. (Open Street Maps)

2021-07-26

The Power Project: Rewiring a Catalina 22 for DC and AC

Five years ago, we created the control panel for our Catalina 22, Fantasia. We needed to add another control to the panel for the bilge pump and re-do much of how the wires are run, so are taking this opportunity to show how we put it together. This is mounted on the shelf above the table of the 1985 and before Catalina 22s. (This scheme won't work on later Catalina 22s that don't have a shelf.)

Panel before bilge pump switch added. Ignore the hanging wires which were still being worked on when this shot was taken.

DO NOT DO ELECTRICAL WIRING IF YOU DON'T KNOW WHAT YOU ARE DOING. YOU CAN CAUSE SERIOUS, POSSIBLY FATAL, DAMAGE TO YOU OR YOUR BOAT, OR POSSIBLY BURN DOWN THE ENTIRE MARINA BECAUSE OF YOUR MISTAKES.

Note that I am not a professional boat installer. You are entirely responsible for determining if this is safe. I am merely describing what I did, not telling you to do the same. If you do manage to burn down your marina, you are entirely responsible, not me!

Foam board template

We started by creating a template out of foam board. Note that the panel is not rectangular, but is instead a trapezoid higher on the right side, about 8" on the left and 9" on the right. We acquired a 1/4"x10"x4' teak board, of which about two linear feet are used here for the front panel and the rest for side panels. A friend with a complete woodworking shop cut the board for us and holes for us, but we used a Dremel tool and a Dremel Shaper & Router Table 231 for the bilge pump switch and constructing our AC panel. The finished edges didn't look quite as good, but the holes are concealed by the edges of the various controls, so it didn't matter.

Panel after addition of bilge pump cutout.

Stuff on a boat is dictated by two sets of standards bodies and their publications: US Coast Guard 33 CFR Part 183 - Boats and Associated Equipment, and American Boat and Yachts Council (ABYC). The specific standards that relate to electrical systems are 33 CFR Subpart I - Electrical Systems and E-11 AC & DC Electrical Systems on Boats. Unfortunately, the E-11 standard is not public, and the price will cause some sticker shock (currently $195). For that reason, I work off the 2008 version which I managed to lay my hands on and assume that not that much changed since then.

The panel itself:

  • Teak board 1/4"x10"x4' @ $15.95 a linear foot.
  • Oak 1"x2"x4' board for U frame.

The various components that are installed in the panel are:

  • Standard Horizon Eclipse DSC GX1000S White VHF (came with the boat, but a similar one can be bought for around $155), held in place with a Standard Horizon Flush Mount Kit STD-MMB-84 ($13.91).
  • Blue Sea Systems M-Series Mini Selector - 6007200 ($33.07)
  • Sea-Dog Line Battery Test Rocker Switch LED 425020-1 ($40.95)
  • West Marine Electrical Panel DC 6 Circuit 8932 ($54.99)
  • West Marine Electrical Panel DC 4 Circuit + 2 12v Power Outlets 8931 ($64.99)
  • Sea-Dog Line USB Power Socket 426502-1 ($18.74)
  • Blue Sea System Bilge Pump Switch 8263 Contura ($39.88)

For the back panel, we needed:

  • Sea-Dog Line Bus Bar Screw Terminal 10x #8 426711-1 ($9.97)
  • Two of Blue Sea Systems Fuse Block 5037 ($27.89 each)
  • 16 AWG marine wire in various colors
  • 10 AWG marine wire to go to the batteries
  • Split Loom
  • Wiring Connectors
  • Stainless steel screws
  • Brass bolts, nuts, hinges, and screws

At the batteries:

  • Two Interstate 24M-AGM-A batteries ($219.95 each)
  • Two Blue Sea System Battery Terminal Mount Fuse Block 5023 ($19.12 each)
  • Blue Sea Systems m-ACR automatic charging relay 7601 ($70.77)

The West Marine four switch panel has outlets for two 12V outlets. I removed and replaced one of the two outlets with the Sea-Dog USB ports. This has an incorporated 12V to 5V step-down transformer and is an easy swap. This allows charging cell-phones and such while at sea. As a note, the West Marine panels are OEMed by Blue Sea Systems, which now sells similar models in grey instead of black and already have the USB ports.

The panel mounted on a frame made of the oak board formed in the shape of a U. These were glued together with wood glue and pocket screws and sized exactly to the opening. This frame was routed out with a Dremel tool at various points to make room for screw heads and some of the controls. This was screwed into the shelf teak panel with stainless steel screws. Holes were drilled from the back side and brass bolts were inserted. This holds the top of the teak panel and held in place with knurled nuts. The bottom has brass hinges, also held in place with brass bolts and knurled nuts. This makes access to the back of the panel very nice, as the top knurled nuts are removed and the entire panel hinges down. On the back of the shelf, some thin backing board was fixed to which the connector blocks, fuse blocks, and negative bus bar are all affixed with stainless steel screws.

Holes were drilled and routed with a Dremel tool into the bottom of the shelf. This allowed all wires to be hidden from view in the cabin by routing them beneath the shelf. These holes were protected with cable glands, although on some later holes we 3D printed rubber bushings to keep wires from getting cut on the edges.

DC Wiring Diagram. This is a system wiring diagram that shows both physical layout and electrical connections. Components below the horizontal dashed line are on the front panel. Components in the upper right are on the back panel. Components in the upper left and in rectangular boxes are elsewhere on the boat.

Following the ABYC standard, DC negative wires on a boat should be yellow or black (TABLE XIII - WIRING COLOR CODE). However yellow is preferable for DC negative to differentiate them from the hot wires in an AC system which are black. Some DC components (such as the VHF radio) came with black negative wires. For those, I wrap the ends of the black wire in yellow electrical tape to make it clear that they are DC negative wires and not AC hot wires.

The ABYC standard says that a fuse or breaker must be within 7" of the battery (E-11, 11.10.1.1.1) unless the wires are in a conduit. The Blue Sea Systems Fuse Block 5037 mounts directly on the battery terminal and provides that fuse. I figure more fuses are better, so this layout has some that are redundant. For example the West Marine panels have a 15 amp circuit breakers built in, but I still have a smaller fuse behind it. I have all LED lights on the boat, so there should not be much current draw at all, so if any fuse blows it probably means something really bad happened, by which I mean a short circuit.

Wiring for the bilge pump
Wiring for the AC panel
Wiring for VHF
Wiring to mast
Wiring to VHF Antenna
Wiring to cabin lights
Wiring to fan
Wiring to chart plotter
Wiring to cabin lights

2021-06-29

Marine Vexillology: Flags on U.S. Pleasure Boats

Vexillology is the study of flags. There are different rules for different countries. These rules have been established over hundreds of years. This post distills vexillology as it applies to U.S. pleasure boats (and mainly sail boats).

Some terminology: vessels wear flags, people fly flags. Flags have two dimensions, called the fly (width) and the hoist (height). The hoist is also the point closest to the flagpole, and the fly the point furthest away from the flagpole.

What Flags Can I Fly?

  1. U.S. Ensign

    The U.S. Ensign

    The U.S. Ensign, commonly called the U.S. Flag, has the highest precedence. It is placed in the most important location on the boat. The design of the ensign is laid out in Title 4 of the U.S. Code Chapter 1.

    Most U.S. Ensigns have the wrong proportions, because the hoist to fly 10:19 ratio in the code causes the flags to wear out faster than a more commonly available 2:3 or 3:5 ratio. Finding 10:19 ratio U.S. Ensigns is difficult. This calculator will give you the correct other dimensions, if one is specified.

    The size of the ensign is based on the size of the boat, with the fly sized at one inch per foot LOA (length overall) of the boat, rounded up to the next commercially available size. Thus a Catalina 22 should have an ensign with a 22" fly, and 24" fly ensigns are available (although not with a 10:19 ratio—opportunity for someone). Other flags on the boat should be 1/2" for each foot of the tallest mast over the water line (30' to 15" for the Catalina 22), or 5/8" per foot LOA for power boats. A flag pole should generally be at least twice the hoist of the ensign.

  2. U.S. Yacht Ensign

    The U.S. Yacht Ensign is worn interchangeable with the U.S. Ensign while sailing in U.S. waters. One or the other should be worn, but not both. It has no meaning outside of U.S. national waters, so if traveling internationally must be replaced by the U.S. Ensign.

    U.S. Yacht Ensign

    The U.S. Yacht ensign originally meant that the vessel was traveling from U.S. port to U.S. port and did not need to clear customs. Carrying goods that required U.S. customs while wearing this flag was considered smuggling. Since pleasure yachts typically did not have goods to declare, they also started wearing this flag. The flag has a 2:3 ratio.

  3. State Flag

    The State Flag is optional, but if worn, it has lower precedence than the U.S. Ensign. Some states, such as Washington, have codes on wearing flags on vessels.

    Washington State Flag

    The Washington State flag has a 5:8 ratio, but other states may have other ratios.

  4. Courtesy Ensign

    When visiting another country, the civil ensign of the other country is displayed, generally on the starboard spreader. The civil ensign may not be the same as the national ensign of a country.

    The Canadian Civil Ensign
  5. Yacht Club Burgee

    A yacht club burgee can be worn at a bow staff, but is generally flown from the starboard spreader on a sail boat. If the state flag is worn on the spreader, it can be flown below the state flag or moved to the port spreader. It generally has the form of a pennant.

    Edmonds Yacht Club Burgee
  6. Organizational Ensign

    Organizational ensigns are from groups such as the United States Power Squadrons or Coast Guard Auxiliary.

    The U.S. Power Squadrons Ensign.
  7. Private Signal

    A private signal is a flag that identifies a person on board. It generally has a swallow tail.

    Examples of Private Signals
  8. Other Flags

    There are other flags that are worn on occasion. The quarantine flag on entering a new country, regatta flags, man overboard flag, owner absent flag, etc.

Where Do I Fly Them?

There are six places that you can fly a flag (shown below in descending order of precedence). The rules that apply on land, where the U.S. Ensign is placed physically higher than other flags, do not apply to marine vessels. Flags should be placed at the place of highest precedence to which they are entitled to be worn. For example, a burgee or private signal is never flown at the stern. On the other hand, if a courtesy flag is worn on the starboard spreader, the burgee could be moved to the port spreader.

  1. Gaff

    The gaff is the pole that comes off the mast on gaff rigged boats. Unless you have some very unusual rigging, this doesn't apply to most sloops or power boats. However, to simulate this location, a flag may also be worn no more than 2/3rd of the way up the back stay on a sail boat.

    Flag at the Gaff.
    (Modified from a photo by Susan Davis CC BY-SA 3.0)
  2. Flagstaff on Stern

    This is a pole attached to the stern of the boat. It can be centered, or offset, usually to the starboard, if necessary.

    The Schooner Zodiac with U.S. Ensign Worn on Stern
    The Schooner Zodiac with U.S. Ensign Worn on Stern
  3. Bow Staff

    This is a pole attached the the bow of the boat. On most sail boats this would interfere with the foresails, so this mostly applies to power boats.

    Flag on Bow Staff

  4. Starboard Yardarm or Spreader

    If there is more than one spreader on a side, then it is flown from the lowest one. There may be more than one halyard on the spreader, in which case the outermost one has higher precedence.

  5. Port Yardarm or Spreader

  6. Masthead

    The truck of the mast is the top (technically the ball at the top of the mast). If there are more than one mast, it is flown from the forward mast. On many sailing vessels, wearing a flag here interferes with sails, antennas, and anchor lights, but a pig stick can be used when at anchor.

When and How Are Flags Flown?

The U.S. Ensign or U.S. Yacht Ensign is typically raised at 8 a.m. or when the boat is first boarded. It is lowered at sunset. If other flags are raised or lowered at the same time, the U.S Ensign is raised first and lowered last. The U.S. Ensign should be raised quickly and lowered ceremoniously. If you are leaving a vessel, and do not expect to return before sunset, then the Ensign should be lowered before you leave.

State flags and courtesy flags are generally raised and lowered at the same time as the U.S. ensign. Yacht club burgees are generally worn day and night. Personal signals may also be worn day and night, however, they should not be worn when the person is not on board.

Additional References

If you are starting out, a good place to start is this page from the U.S. Power Squadron. They also offer a 37 page booklet ($15 including shipping) that is a great reference on flags on boats.

Another great resource is Reeds Maritime Flag Handbook by Miranda Delmar-Morgan.