2022-09-28

Wiring the Instruments on a Catalina 320

We are getting close to finishing the update to our wiring on our 1994 Catalina 320 Achernar. As the boat came, it had the original Raymarine depth, wind, speed, and autopilot devices at the binnacle. It also came with an approximately ten-year-old AIS, antenna splitter, AM/FM radio, and chart plotter, as well as an ancient VHF radio, and Garmin radar dome on the mast. The chart plotter supports NMEA 2000, but the AIS only supports NMEA 0183 (see the other posts we have done about these technologies). The NMEA 2000 network on the boat only had three drops: 12V in, a Garmin 17X GPS antenna, and the Garmin 4212 chart plotter. The chart plotter showed radar and GPS, but none of the info from the devices at the binnacle, nor the AIS info. The AIS broadcasted the info about the location of our boat, but didn't have any way to show the location of any other boats.

Our goals:

  • A VHF radio that supports DSC
  • A VHF remote handset accessible from the cockpit
  • A chart plotter showing depth, wind, speed, autopilot, and AIS info
  • Saillogger recording the info on our travels with a reliable Internet connection
  • Replace as few of the instruments and devices as possible

Eventually, we'd like to replace all the instruments and devices with state-of-the-art equipment. But this will take a considerable amount of time and we'd rather be out cruising.

Since the VHF radio didn't support DSC, that required a replacement. We consider DSC to be a critical safety system on the boat as it provides a panic button that alerts the Coast Guard to our exact location should we run into problems. We replaced the VHF with a new Standard Horizon GX6000 (in retrospect, we could have gone with a cheaper radio and still met our goals). We also acquired the RAM4 wired remote microphone. We considered the wireless remote microphone, but the reviews we read said that the wireless version was unreliable. Unfortunately, the squelch on the radio failed shortly after we installed it, causing the radio to blast static at full volume. We had to send it in for warranty repair, which required almost six weeks to turn around, plus the cost of shipping it to them.

We ran new wires between the "garage" (the large locker on the port side of the Catalina 320) and the panel to the right of the chart table in the cabin. The two wires we ran were a NMEA 2000 backbone cable and the cable to support the RAM4 microphone. There is a channel for wires that runs across the top behind the galley cabinets. We opened the panel on the right side of the top right cabinet that allowed a fish tape to be extended from the electrical panel, through the channel, to the garage. This made fishing the new cables relatively easy. There is lots of room for cables in the channel.

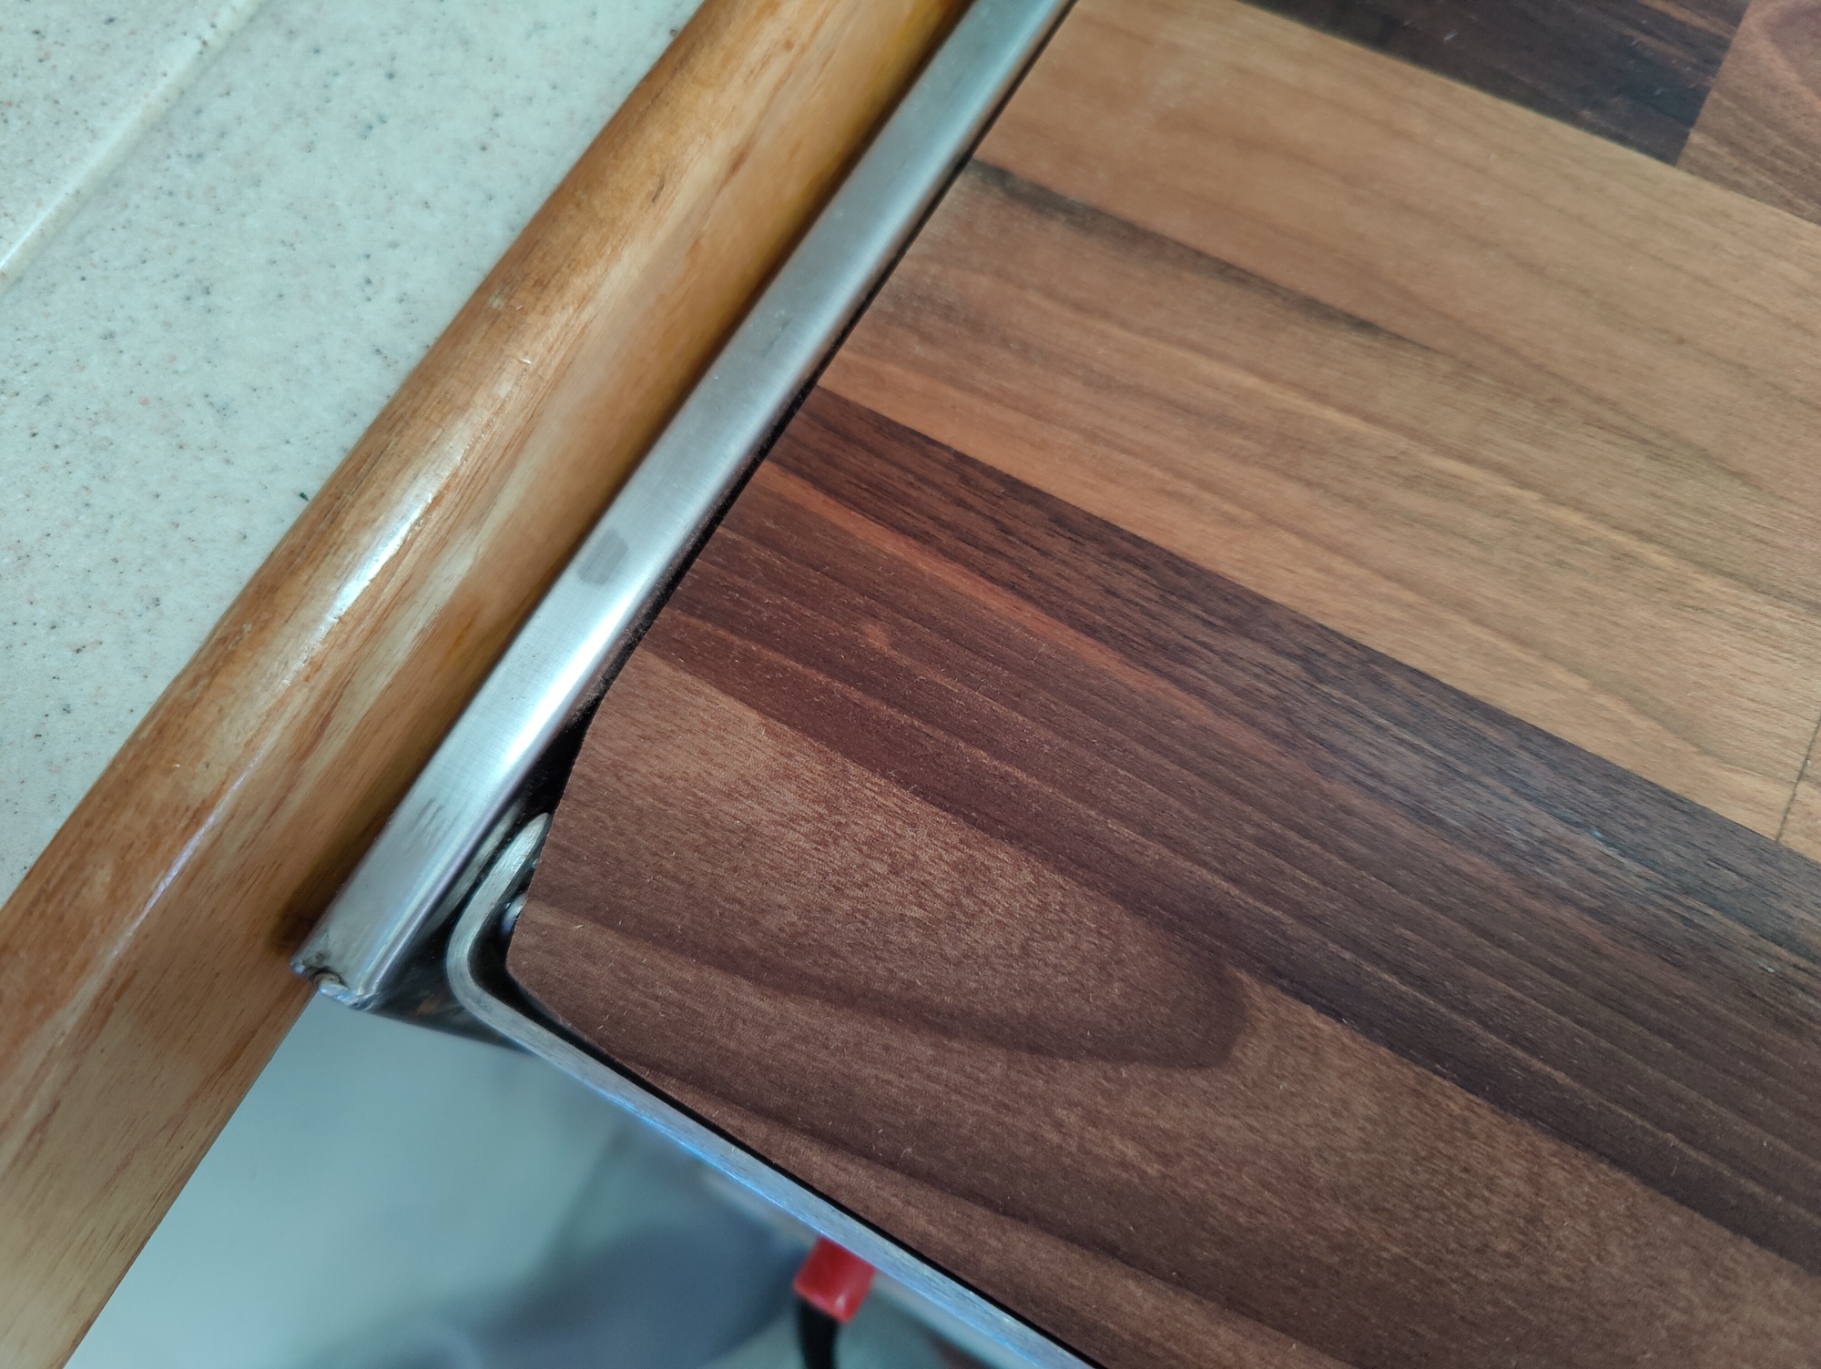
Wires run under the pedestal in the aft cabin

In the garage, we added two blocks that provide the connection of the NMEA 2000 backbone to the devices at the binnacle. The ST60+ depth, ST 30 wind, ST 30 speed, and ST4000+ autopilot were all connected to each other with a SeaTalk1 network. However, the network did not extend anywhere else. We ran a new SeaTalk1 cable from the garage to the port aft lazarette, then under the pedestal in the aft cabin and up the stanchion to the devices. This required taking off the cover from under the pedestal in the aft cabin, which was held in place with bunch of screws. We removed two cables that ran up to the instrument panel: an obsolete and unused depth cable and a power cable. This freed space inside the port-side stainless steel pedestal support stanchion. We pulled the SeaTalk1 cable by taping it to one of the cables we were removing. We had to cut the SeaTalk1 cable to pull it, then splice the cable back together because the cable end was too large to fit down the stanchion. Because the SeaTalk1 cable provides power, we no longer needed the separate power cable and removed it.

The SeaTalk1 cable is attached to a small block that just allows another SeaTalk1 cable to be plugged in. That then connects to the SeaTalk1 to SeaTalk NG Converter. This block converts SeaTalk1 to SeaTalk NG (which is the same protocol as NMEA 2000, but with proprietary connectors). This then has a cable that has a SeaTalk NG connector on one end and NMEA 2000 connector on the other. This connects to the NMEA 2000 backbone. As soon as this was connected, the chart plotter started showing wind speed, wind direction, and depth. This info was also passed to saillogger, so shows up on the monitor page.

Achernar Wiring Block Diagram

The other end of the NMEA 2000 backbone runs into the cabin. This is connected to the Standard Horizon GX6000 VHF. Although the radio has an AIS receiver (but not transmitter) built in, we are not using it, instead using the West Marine AIS 1000 transceiver that came with the boat. (For the last five years Standard Horizon has described a GX6500 model that has an AIS transceiver built in, but the rumor is they have had trouble getting it certified by the FCC.) While we could receive AIS on the GX6000 and transmit with the AIS 1000, we run into a little problem with the antenna.

On a sloop sail boat, you only have one mast, but you need two antennas: one for VHF transmissions and one for AIS transmissions. They need to be separated by several feet. On a power boat, you can just fix two antennas to the top of the cabin in different places. On a sail boat, the workaround is something called an antenna splitter. You put up one antenna, but plug the VHF and the AIS into the antenna splitter and connect that to the antenna. (It can also handle AM/FM.) VHF is considered a safety system. If you push the DSC panic button, you cannot have the AIS transmitting, so when the VHF is being used, the splitter gives it priority. But if you have two AIS units, you will need two splitters, which would theoretically work, but asking for trouble. (Why the GX6000 doesn't have an antenna splitter built-in is a mystery.)

Instead, we just ignored the fact that the radio has an AIS receiver and used the West Marine AIS 1000 transceiver that came with the boat. That came with its own can of worms, the first of which was that we changed the MMSI associated with the boat. The MMSI that came with the boat was likely issued by BoatUS or the US Power Squadron. These free numbers only work in the United States. We plan on going to Canada on our boat, so the MMSI needs to be issued by the FCC. An FCC MMSI (which you can identify because it ends in zero) is exchanged with other countries, including Canada. This allows you to push the DSC panic button in Canadian waters and the Canadian Coast Guard will come rescue you. We applied for and received our new MMSI.

However, the FCC does not let end users of electronic equipment arbitrarily change the MMSI on equipment. Our new radio lets you put the number in once, but you have to send it back to Standard Horizon to change it thereafter. Our West Marine AIS already had a MMSI inputted, so it could not be changed. We contacted West Marine, but of course they are not the manufacturer, no longer sell it, and don’t really support it any more. West Marine emailed back some minimally helpful information that eventually led to getting it changed.

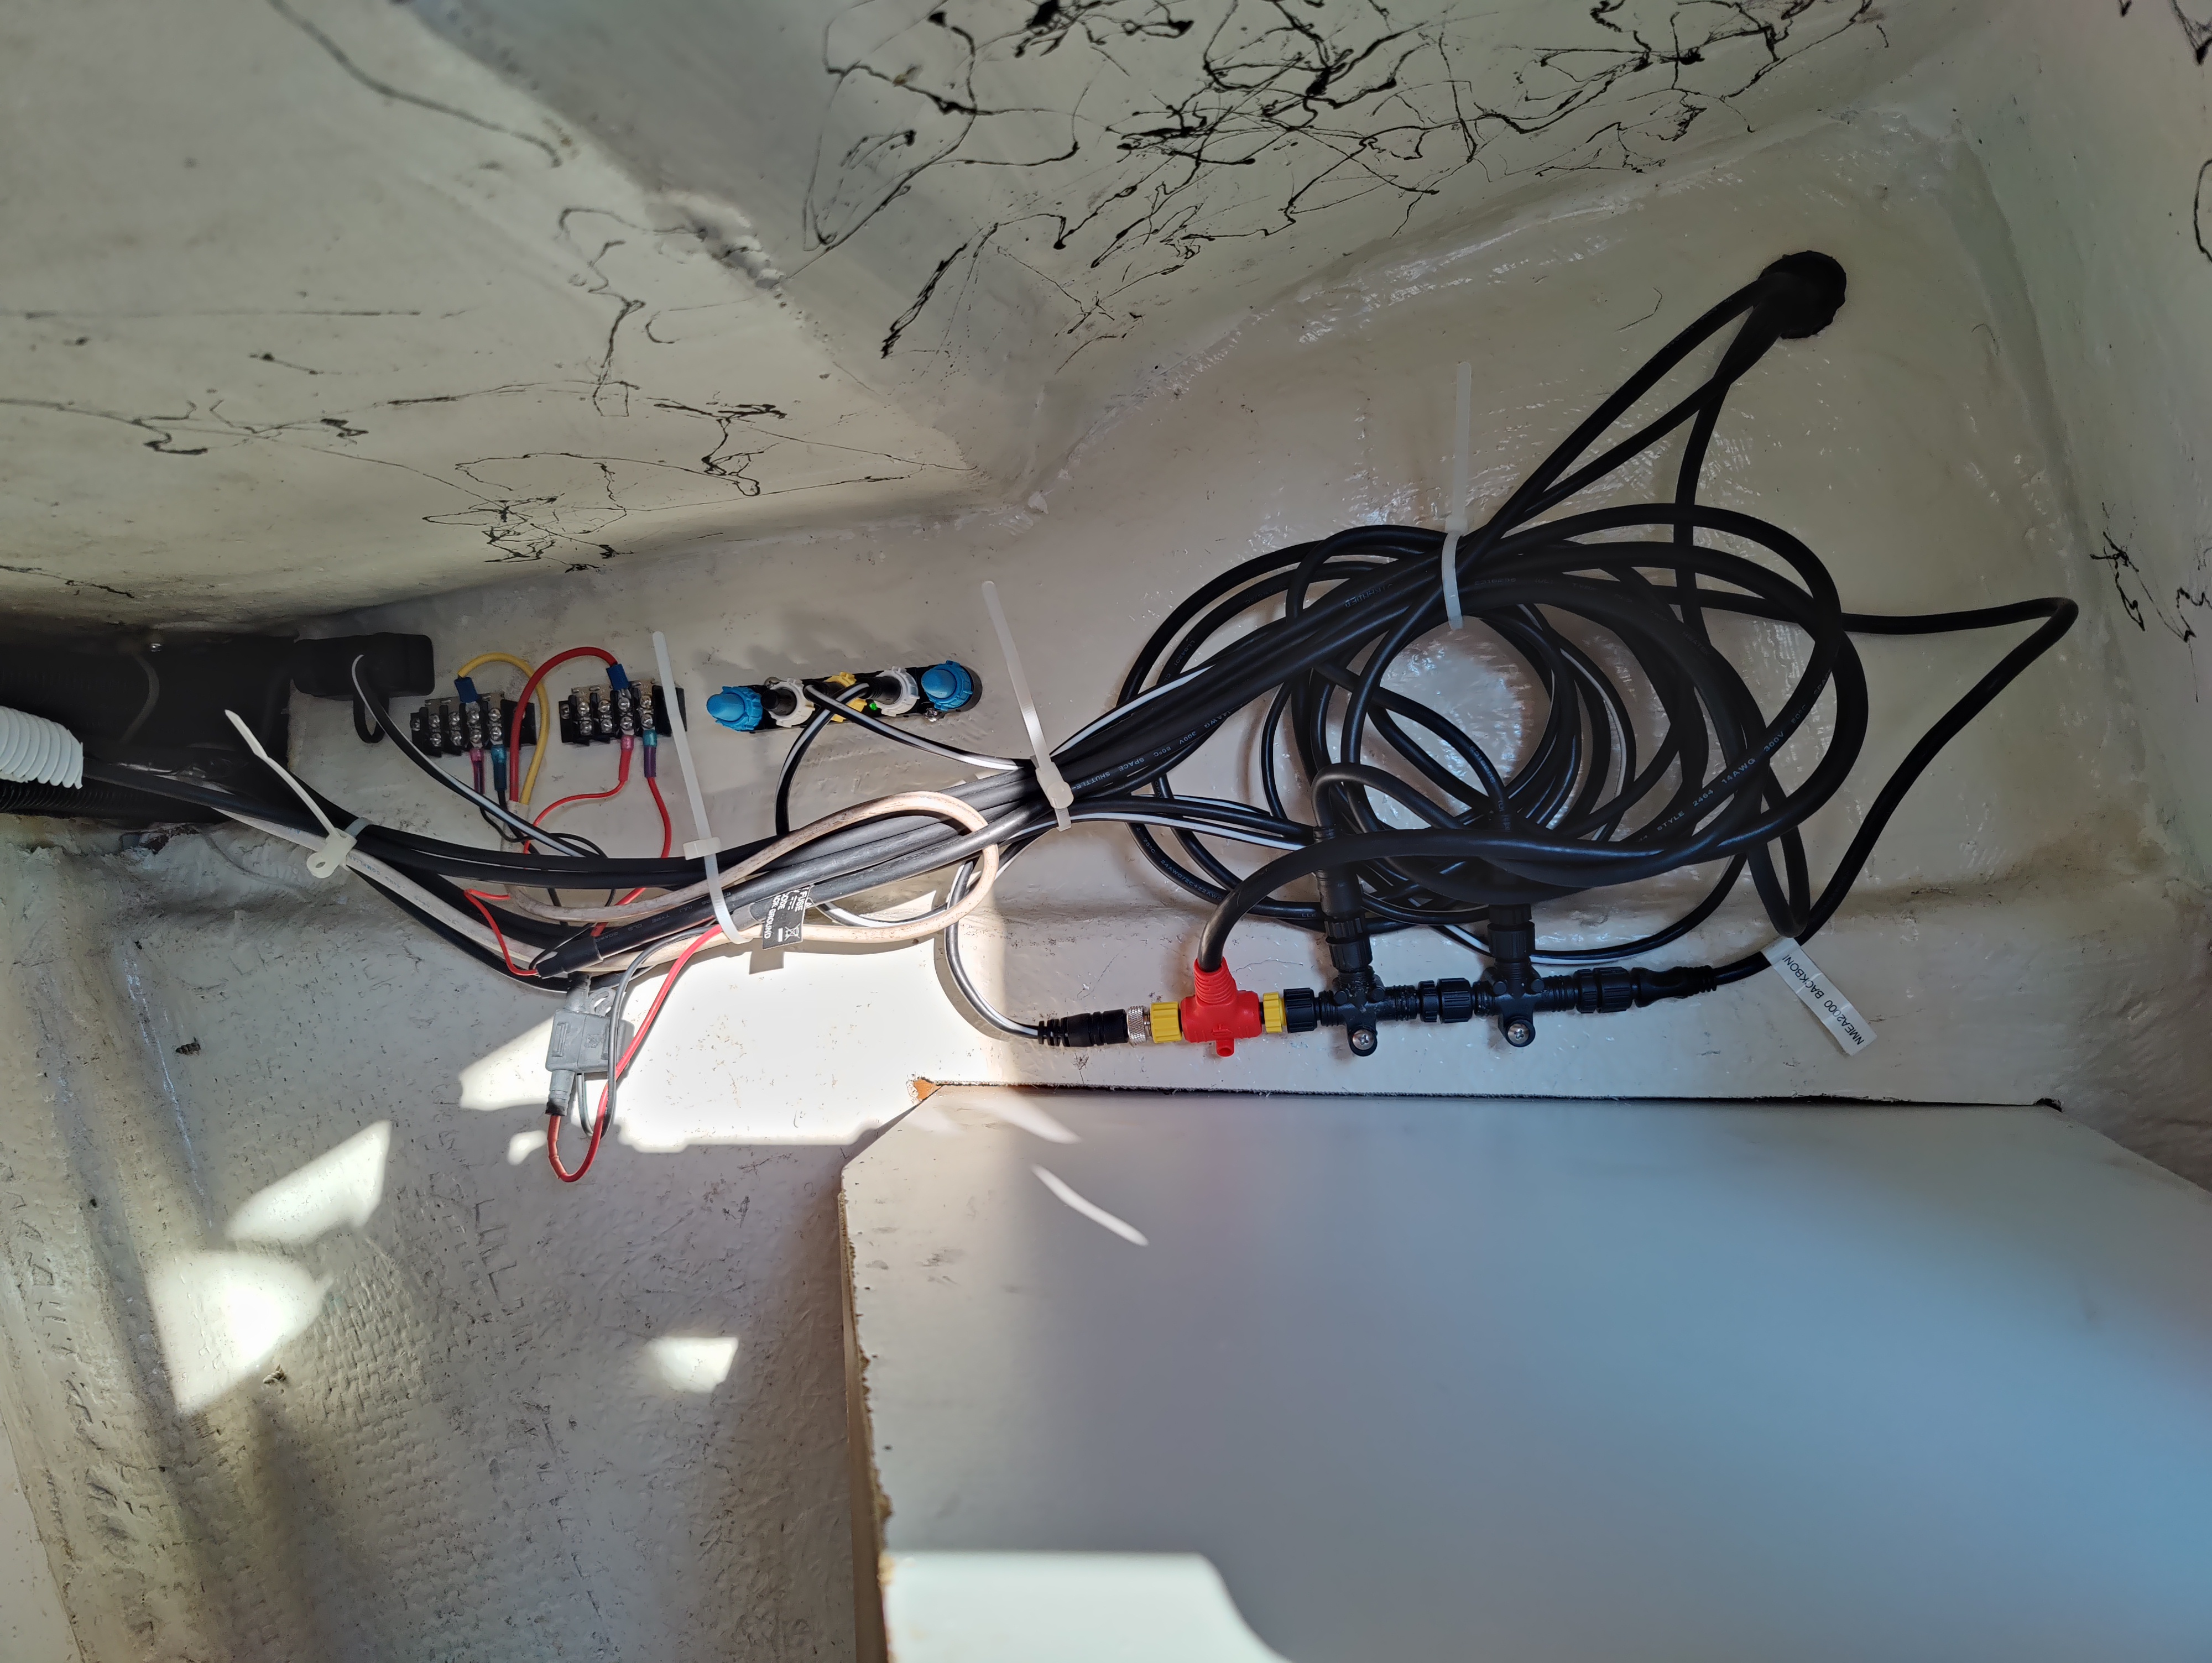
The wiring in the garage. Not as beautiful as we would like, but better than it was.

The next challenge was that for the chart plotter to get the AIS info. We needed the AIS to be on the NMEA 2000 network. That is all well and good, except the AIS 1000 only does NMEA 0183. We bought a Digital Yachts iKonvert unit that converts 0183 to 2000. While relatively expensive, it still was much cheaper than buying a new NMEA 2000 compatible AIS transceiver. The iKonvert little box has a NMEA 0183 connector on one side and a NMEA 2000 connector on the other. There are also DIP switches that control what messages should get passed through and the speed of the connection, which we set to AIS and GPS transmitting at 38400 baud. As soon as it was connected, the AIS info from other boats started showing on the chart plotter. A friend confirmed that we were transmitting our location, but that was always working.

But then a new problem started happening: The chart plotter was getting GPS info unreliably. The AIS 1000 has its own GPS antenna, separate from the one on NMEA 2000 network. The iKonvert was passing GPS info through from the AIS 1000 to the NMEA 2000 network, and the Garmin 4212 chart plotter was prioritizing the AIS 1000 GPS info. For whatever reason, this info was coming through intermittently and causing an error. We finally found the setting in the chart plotter to prioritize the Garmin X17 GPS antenna, which solved the problem.

We mounted the external connection for the RAM4 microphone on the port side, just below the propane locker. The boat came with about an inch diameter of broken fiberglass at exactly this spot which needed to be repaired, so drilling it out solved two problems. The one drawback to this location is that the aft locker door will run into the microphone if it is fully opened. So we will be attaching a cable to limit the distance the door will open by a couple of inches.

The last thing we needed was for the Raspberry Pi that saillogger runs on to have a reliable Internet connection. For that we acquired a Galaxy pad A7 Lite with a SIM card from T-Mobile. This runs a wi-fi hotspot that the Pi connects to. The monthly cost is relatively cheap, and the device was free after paying tax and a connection charge.

All of the equipment is now connected and working. Our next step is to make it all pretty, but that’s a topic for another day.

2022-09-24

Don't Use 5200 On Your Boat

This is going to be a rant about 3M Marine Adhesive Sealant 5200 and why you shouldn't use it on your boat. If you are not a boat builder, you have no reason to use it. The problem is that 5200 creates a permanent bond between two surfaces. There is that word "permanent". What, exactly, is permanent on a boat? Is a port-light permanent? Or a winch? How about combing? A stanchion? A bow roller? None of these are permanent. All of them will need to be serviced and replaced at some point. It might be 10 years, or it might be 20. If you use 5200, you, or the person who eventually owns your boat, will swear at that idiot who used 5200.

Okay, there are a few reasons to use 5200. If you are putting a new thru-hull below the waterline, that might be a reason. I think we used 5200 to fasten down the mast step on our Catalina 22 that was loose because that has a seriously long lever trying to pry it up from the deck. But almost anything that you think you should 5200 for could also be done with 4200 or even 4000.

Some people will use debonding agents, or have a scheme with a guitar E string for getting 5200 separated. But why do that when you could have used 4200.

Captain Boomies did a cool demo on why 5200 is the wrong product for anything you can think of on a boat. When you think of something that you might want to use 5200 on, ask yourself "can I use 4200 or even 4000 for that thing".

2022-07-25

Installing the Raspberry Pi and Using Saillogger

A new addition to our boat is the ability to log all of our travels. To do so, we added a Raspberry Pi powered by the boat's 12V system, connected to the NMEA 2000 backbone, and running a program called Saillogger. See our article on boat networking.

We started by buying a Raspberry Pi. This is a single-board small computer. It has most of the functionality of a large desktop on a tiny board. The specs: 1.5 GHz 64-bit quad core ARM Cortex-A72 processor, on-board 802.11ac Wi-Fi, Bluetooth 5, full gigabit Ethernet (throughput not limited), two USB 2.0 ports, two USB 3.0 ports, 8 GB of RAM, and dual-monitor support via a pair of micro HDMI (HDMI Type D) ports for up to 4K resolution. It runs a version of Linux.

Raspberry Pi 4 B

The Raspberry Pi then has added the PICAN-M hat board. This plugs into it and provides NMEA 2000 and NMEA 0183 connections, as well as providing power from the NMEA 2000 connection. It takes in 12V and steps it down to 5V.

PICAN-M hat board that plugs into the Pi

This entire setup is then enclosed into a nifty little case. It is about the same size and somewhat thicker than a pack of playing cards.

Case for the Pi, plus the PICAN-M

You can test the whole setup by using a micro HDMI cable, monitor, USB keyboard, USB mouse, and either a wired or wireless Ethernet connection. The Pi will need a micro SD card. If you want to power the board at home for testing purposes, you will need a 120V to 12V converter to power the NMEA 2000 backbone. You may also need a USB adapter for your computer to transfer the operating system onto the card. We did all our initial setup at home, then moved to the boat where we remotely log in using a laptop via WiFi with both devices connected to a phone hotspot.

Our setup required that we pull a NMEA 2000 backbone cable from the "garage" lazerette where our existing backbone was located to the panel to the right of where the AC/DC distribution is located in the cabin of the Catalina 320. The boat's existing cables feed above and behind the cabinets in the galley. We unscrewed the wood panel on the rightmost cabinet, then easily used an electrical fish wire to pull it from the garage. (Make sure to disconnect from shore power before doing this as there is live AC back there.) This is then fed down behind the AC/DC panel. Power is provided by the 12V on the NMEA 2000. We already have a Garmin 17X GPS antenna on the boat hooked to the backbone to feed GPS info to the chart plotter. We put a "T" on the backbone and installed the terminator. Then we attached a drop cable to the PICAN-M NMEA 2000 socket. This kit will provide all the basic NMEA 2000 hardware.

We installed the Debian and SignalK software onto the Pi. We found this page provided really excellent instructions on the install. If you are not familiar with Linux, you may need a friend to help you. We then installed Saillogger.

Sailogger is a program written by a friend of ours. It consists of two parts: a program installed on the Raspberry Pi through SignalK and a web site to which it uploads the information. It automatically records every time you leave a marina and where you have gone, pulling the info from the GPS (and other devices) on the NMEA 2000 network. The next time the Pi gets an internet connection either through a marina wifi or a phone hotspot, it uploads it to the Saillogger web site. There is very little configuration necessary and virtually no information that needs to be added to the logs. You don't need to remember to start something or end it...it is all automatic as long as the NMEA 2000 backbone is powered.

After installing it, we went out for a day sail on Lake Washington.

One image from the Sailogger upload

Detail of performing Man-Overboard drills

2022-07-19

Cutting Board for Stove Top

We found a perfect cutting board to go onto the stove top of the Seaward Hillerange Model 2172 stove that came with our 1994 Catalina 320. It is a Bisetti Walnut cutting board. If the front bracket wasn't on the stove top, this would drop right in. However, we needed to pry the Bisetti logo off the front (it is a friction fit into two holes, so comes right off), then sand it down where the bracket and screws on the side goes. Then we applied some food grade mineral oil. It is a beautiful addition to the galley. The board has two sides, one with a groove, and either side can be up.

To hold the board perfectly level, we added two brackets to the lower screw on each side of the front fiddle. These are Everbilt 547 475 one inch stainless steel corner brackets. We lightly filed the corner so it wasn't knife sharp.

Cutting board
Corner that had to be sanded down
L Bracket to hold up edge

2022-07-15

ASA Certification on a Bavaria 41

Most places that you charter a boat, you need to get a certification to show that you are qualified. The two organizations that provide the the most widely recognized certification organizations in the United States are US Sailing and American Sailing Association (ASA). Our plan was to get our certifications so we could fly somewhere else, such as the Caribbean, and charter a boat there.

Just before Covid hit, we were on our way to getting certifications with US Sailing, having completed our Basic Keelboat certification. Covid put a hold on completing the certifications. When we decided to upgrade our own boat, we were initially looking at larger boats, but we chose to go somewhat smaller at 32 feet to leave budget to charter boats elsewhere (and budget for upgrades, as well). As we revisited certifications this year, we found an ASA course that met our needs. We booked a week-long trip through San Juan Sailing that covered ASA 101 Basic Keelboat Sailing, ASA 103 Basic Coastal Cruising, and ASA 104 Bareboat Cruising. This allows us to charter monohull boats up to 45 feet anywhere in the world.

San Juan Sailing has a fleet of about 60 boats mostly sailing out of Bellingham, Washington. We got booked onto a three-cabin, two head, Bavaria 41, Fresh Aire. The cruise had five crew: Sandi and Greg, Mark and Jessica, and the instructor, Bob. Bob has been sailing for 30 years and knows his stuff. Mark and Jessica have been power boaters on lakes and rivers, but are new to sailing.

The Bavaria 41, Fresh Air Mediterranean docked at Stuart Island.
The course ran from Saturday, July 9 to Friday, July 15, 2022. We checked in by 11 a.m. and brought our stuff down to the boat. The first test was finding all of the safety equipment on the boat. We drew straws for cabins, and got the starboard aft cabin. This cabin has the feet at the aft of the boat, which turns out requires more gymnastics than the aft cabin on the Catalina 320 that has the feet pointed at the port side.
San Juan Islands
(by Pfly, CC BY-SA 3.0)

Saturday, July 9: We got lunch ashore, then prepared to leave dock. Our first stop was Sucia Island, on the north side of the San Juan Islands. We left the marina in Bellingham and raised sail, headed north of Lummi Island. At Sucia, we tied up to a linear mooring system in Echo Bay and spent the night.

Sunday, July 10: We sailed to Stuart Island and Mediterranean docked. We hiked to the T-shirt place.

Monday, July 11: In the morning, we did docking training against the line linear docks at Stuart. We sailed to Roche Harbor and docked at the marina.

Tuesday, July 12: We sailed all the way around the south end of San Juan Island, up the east side of Shaw Island, and anchored in Blind Bay. The seas in Harro Strait were four feet. Winds in San Juan Channel were 29 kts sustained, gusting to 32 kts. Sailed very reefed in using the furling mainsail and genoa.

Wednesday, July 13: We sailed to Rosario Resort on Orcas Island and docked at the marina.

Thursday, July 14: We sailed back to Bellingham and docked at the marina. We refueled and pumped out, performing docking training.

Friday, July 15: We did some docking practice in the marina in the morning.

All in all, a successful week. We learned some new techniques and got much better at sail trim. We got a lot of docking practice in. We did lots of man-overboard drills. These drills are not just good for emergencies, but practice in handling the boat.

Sandi at the wheel

2022-06-15

Boat Networking

This is a brain dump of what I've figured out about boat networks.

There are devices on a boat that need to talk to each other, needing protocols and physical connections. This is on a boat which is a physically demanding harsh environment. There is little space, frequently not easy wiring runs, sharp corners (both radius and cutting), and salt water and salty air. They are making some wireless devices now, but I don't trust them to provide a reliable connection in wireless saturated areas (and near military bases), and you still frequently have to get power there anyway so you still need wires.

There are some industry standards:

On our boat, we have to deal with another proprietary physical connection/protocol called Raymarine SeaTalk 1.

The NMEA 0183 physical connection is essentially a RS422 serial connection (an old computer standard that was used to connect computers to modems, among other devices). It is point-to-point...two devices that want to talk to each other need two wires running between them, but one transmitter can have several listeners. While this standard is obsolete, it is still used in many older devices, and newer devices sometimes still support it for backwards compatibility. On Fantasia, we used NMEA 0183 to feed GPS data from the chart plotter to the VHF radio. If you hit the DSC (Digital Selective Calling) panic button on the VHF radio, it would transmit the GPS data to the Coast Guard in a digital format, broadcasting the MMSI (a primary key number into a Coast Guard boat database) and GPS coordinates and saying "come get me". The protocol is expressed essentially in text "sentences" like $GPAAM,A,A,0.10,N,WPTNME*32. It is very low bandwidth, 4800 baud normally. You must run an extra two wires for power, so normally there are four thin wires between devices.

NMEA 2000 is essentially CAN Bus, a standard used in cars, airplanes, and manufacturing. There is a backbone cable that stretches on the boat that is terminated on each end. Various devices plug into this backbone cable, and the drop cable going to the device can be 27 feet. The protocol is 8 byte packets. Most devices produced in the last 10-20 years use this protocol. Bandwidth is 250kbs--good enough for most data, but not for radar/sonar/video. It has power up to 25 watts per device on the wire.

Example of a NMEA 2000 backbone similar to ours.

Our NMEA 2000 backbone on Achernar is literally about 1 foot long (this will be changing soon), with the drop cables running to different points. As we bought Achernar, there were three drops to the NMEA backbone: 12V power in, a Garmin 17X GPS antenna, and a Garmin 4212 chart plotter. Significantly missing is information from the West Marine 1000 AIS transceiver, which has NMEA 0183 (only) output that currently goes nowhere.

NMEA OneNet is essentially Ethernet, with a custom protocol sitting on top of IPv6. The standard took about 10 years to produce, and was published about two years ago. As near as I can tell, no manufactured devices actually use it yet. It should be able to handle radar/sonar/video. It does power with PoE (power over Ethernet), with all the strengths and limitations that has.

The wind, depth, speed over water, water temperature, and autopilot on Achernar don't use any of these to communicate to the displays at the helm...it uses a proprietary protocol called Raymarine SeaTalk 1. (This is not to be confused with SeaTalk NG or several other similarly named protocols. SeaTalk NG is a rebranded NMEA 2000 using proprietary cables.) The details of this SeaTalk 1 have been reverse engineered. You can get SeaTalk 1 devices to talk to a NMEA 2000 network by converting SeaTalk 1 to SeaTalk NG, then connecting SeaTalk NG to NMEA 2000. With this translation, we should be able to see wind, depth, speed, and water temperature on the chart plotter without having to replace all the devices.

Sometimes you want to get the info on the NMEA 2000 backbone in a format that can be interpreted by a computer. With OneNet, that would be easy, you just get a device driver for the OneNet packets, but with NMEA 2000, that's trickier. There is a device called iKommunicate that convert NMEA 2000 packets into Ethernet packets. It basically plugs into the NMEA 2000 backbone and dumps out Ethernet packets in HTTP SignalK format on an Ethernet port. (It also accepts a couple NMEA 0183 devices.)

SignalK is an open source JSON protocol for understanding NMEA 2000 data. The output from the iKommunicate device can be fed to the Ethernet input on a computer or a Raspberry Pi. There are various programs that interpret the SignalK format and produce displays of instruments and log where you have been. Another alternative is there is hat board that fits onto a Raspberry Pi unit called PICAN-M. This board performs the same task as iKommunicate, except it only works with a Raspberry Pi.

Our friend Ilker has written a Signal K logging program that's pretty nice: https://saillogger.com. I will write up our use of this program later.

Our Garmin radar uses an Ethernet cable for talking to our Garmin chart plotter. The cable is run point to point from the radar dome to the chart plotter. It uses a proprietary Garmin protocol.

2022-05-04

Opening Day Raft-Up

Tyee Yacht Club raft up. We are the third boat from the left...the small one.

Only three days after making our way down from Anacortes, we headed back out to join Tyee Yacht Club's raft-up at the Montlake Cut for Opening Day. We tied up with 13 other boats (two more joined after the photo was taken) just north of Marsh Island at the Seattle Arboretum for five days. Opening Day is the official start of Seattle's boating season. On the north side of the cut is a log boom where hundreds of boats tie up. We tied up on the south side where only the yacht clubs get to tie up. Pot luck dinners, drink, and other events happen on the boats.

It was cold and rainy most of the days, but brightened up just in time for the boat parade down the cut.

2022-04-29

The Voyage South

We began our adventure travelling south toward are new slip in Kenmore. Our slip became available on May First, so although we could be faster we decided to take advantage of our time. We headed down the west side of Whidbey Island and across the eastern end of the Strait of Juan de Fuca. This area can be extremely rough if the conditions are not good, but on this day, the weather was perfect. The water was glassy. The boat was running well.

The worst seas we saw the entire trip

We pulled into Tyee Yacht Club's virtual outstation at Port Hadlock. It's called a virtual outstation because there are no dedicated docks for the club, but they will do their best to fit you in. We got a slip on their newly refurbished dock. They have done a great job upgrading the docks. New LED lighting, new power stations, and a pump-out at every two slips. Using our club membership, the cost was free!

The next morning we headed down to Tyee West Outstation at Eagle Harbor on Bainbridge Island. We joined 20 other boats for the 75th anniversary of the club. We rafted to another boat for the night and joined the pot luck that night.

Headed through the small lock

The next morning we headed off toward our dock. We have to come in through the Hiram Chittenden locks into the Lake Washington Ship Canal. Our friends that we were tied to at the outstation were right in front of us. After getting through the locks, we had the privilege of screwing up all of Seattle traffic as we made them open four of the bridges as we move through the canal. On the 22, the only bridge we needed opened was the Fremont bridge, and even then, it's only by inches. With the 320, we need them all open as most have 45 feet of clearance, and our mast is 50 feet with the antenna.

Raising the bridges

We finally got to our dock, only to find it still occupied. We tied up in temporary space and made a few calls to the after hours number for the harbormaster. Some people eventually came out and moved the boat and we could pull into our slip for the next year. The advantage of this slip is that it is five minutes from our house, so coming down and working on the boat is easy and we can go out for evening sails easily.

The weather window was just perfect, which was really good because we were sailing on a schedule. You never want to be sailing on a schedule! The weather sucked before and it sucked after, but we had three days of sunshine and calm seas.

2022-04-25

Achernar

We have renamed our Catalina 320 to Achernar. Achernar is pronounced ay-ker-nar, with a long A sound. It's name comes from Arabic, which means End of the River. It is named for the last star in the constellation Eridanus, which is the River constallation. As a .5 magnitude star, it is the ninth brightest star in the sky. Because it is a southern star, it is currently visible only below 33°N, a little south of Los Angeles. It is a blue star, and is currently the flattest known star in the Milky Way, spinning so fast that its equatorial diameter is 35% greater than its polar diameter. Eridanus is a river of stars that heads south from near Orion's left foot. It ends at Achernar, the end of the river.

The boat name shows the stars of Eridanus, meticulously recreated in software by a program Greg wrote. The font is Decotura ICG, the same font we used for the name on Fantasia.

Achernar shows up in popular culture in several contexts. It was Jack Vance's favorite star. It showed up in many of his works, but particularly in The Dying Earth, the creature Firx came from Achernar. In the Star Trek universe, the planet Romulus, home world of the Romulans, circles Achernar. Vulcan is also in Eridanus. Our theme song is Achernar, by Carlo Whale.

2022-04-24

Dripless Shaft Seal Installation

We began our trip moving the boat from Anacortes to Kenmore. The first step, though, was to take the boat out for some upgrades. We motored from Cap Sante Marina to Skyline Marine Center on the other side of the peninsula. It's only about 4 miles on land, but about 12 nm by sea. It took us about two hours. We backed into a dock using our new docking skills, then got hauled our and placed on the hard at their DYI yard. There, Fathom Marine installed our new dripless shaft seal.

Boats of this generation come with a packing gland. This is the material that keeps water coming into the boat around the propeller shaft where it enters the boat. Except a packing gland has to let some water into the boat, because it also acts as the lubricant, keeping the shaft from overheating. This puts a constant amount of water in the bilge. This means the boat always has moisture in it, which leads to mildew and other problems if not controlled. A dripless shaft seal uses a different mechanism for lubrication, meaning that no water needs to enter the boat from the shaft. They are not terribly expensive, but there is the labor and the boat must be hauled out.

While doing our docking training, we noticed the transmission was having quite a bit of trouble going into gear. Eventually, we discovered that the idle was set too low for our Perkins engine. The correct idle was buried in the Perkins manual. When bumped up to 1000 RPM everything worked just fine. This is faster than most engines, but the transmission just does not work at a slower idle.

Adding our new boat logos

While the boat was hauled out, we took the opportunity to lubricate all of the thru-hole valves. We also removed the remaining boat name, home port, and Washington State ID number. Our boat is Coast Guard Documented now, so should no longer have those numbers on the bow. We then added the new boat name and home port.

The boat was then dropped back in the water. We took advantage of our reciprocal moorage with Flounder Bay Yacht Club to stay there at Skyline for two nights, while we got all our ducks in a row for the voyage south.

2022-04-17

Docking and Maneuvering Training

We decided we needed some additional training on docking. On the 22, docking is not terribly difficult. Greg could stop the boat just by holding the bow pulpit or stanchion. But with the 320, trying to stop a 11,700 pound boat under diesel power just doesn't work the same way.

Shearwater University is a US Sailing instructional group run out of Cap Sante Marina in Anacortes. Their slip for Ardenna, their sail boat, was only about 40 feet from our slip. We ran into them several times while doing work on our boat. They do training on your boat, if you like. So we contracted to have Mark go out with us and give us some docking and maneuvering training. The night before, we had them help us get the boat turned around and moved to an easier slip to get into and out of.

The morning of our training we went to Fisheries Supply and West Marine and bought two Shaefer mid rail cleats and two 5/8" 35' docking lines (later adding two more). The mid rail cleats slide onto the 1.25" tracks, which takes no effort at all to install. Although the cleats were expensive, when you factor in time to install permanent cleats, they were cheap.

Shearwater teaches a single line docking technique. It's pretty slick. It's designed for having one pilot and one crew. It needs to be modified a bit for different conditions, depending on the wind direction and whether launching forward or toward the aft, and which side your prop walk takes you. For launching, essentially the scheme is to have the engine push against a single spring line at midship that is looped around the cleat and back to the mid rail cleat. Then all the other lines can be removed. With the wheel turned, that one line will pull the boat into the dock. The mate comes on board. The boat can then be put into neutral, the spring line untied, the boat put into gear, the spring line unlooped from the dock and you are underway.

Coming in, the mate goes onto the dock with the spring line. It is looped around a cleat but not locked. When the boat is at the right place on dock, it is placed into neutral. The spring line is locked. The wheel is turned and placed in gear at idle speed. The boat sucks right into dock and held in place by the single spring line. Now at leisure the entire boat can be made secure with forward and stern lines. Then the engine is shut off.

Docking with these techniques is so much less stressful. We put it to use immediately and with just a little practice it is working very well. There is only one step in docking and launching that has to be timed well, which is getting the spring line on and off the cleat. The rest can be done at leisure. Nobody is jumping on to a boat that is leaving the dock, which is much safer.

2022-04-02

Out for a Test Sail

We took the 320 out for a test sail from Cap Sante Marina in Anacortes. The dock we were on is tricky, as it is in a narrow channel that is affected by the tides and there were other boats on the parallel dock. Still, Sandi took her out smoothly. We got her out in the bay. After testing motoring for a bit, we noticed the transmission was not quite reacting the way we'd like, being stiff and not wanting to go into gear. We brought out the jib, and shut the motor off. On the first tack, the jib knocked one of the spreader boots off, which landed on deck. Our rigger had said they were old, but thought they'd last the season. The spreader boot acts as a cap on the end of the spreader that keeps the sail from getting snagged and ripping. It's kind of important to have.

Underway for the first time since the sea trial

We decided not to bring the main out, partly because we had the Dutchman system only partly connected. We still needed the backstay for that, which we had on order. The Dutchman is an interesting alternative to lazy jacks. There is a filament that is threaded through the sail that goes from the bottom to the back stay fastened from a halyard at the top of the mast to the end of the boom. The filament attaches at two places on the backstay. When the sail is dropped, it flakes itself on the filaments. This Dutchman was original to the boat, but the filaments were broken and the backstay was nowhere to be found on the boat. We had taken the sail into Doyle sails in Seattle. They replaced the filaments, as well as adding a second reefing point and replacing the slugs that hold the sail to the mast. Four of the slugs were broken when we bought the boat, but they all needed to be replaced.

After being out for a short time, Sandi expertly piloted her back into our dock.

In the next several days, our rigger, Kent Morrow of North Sound Rigging, went up the mast and replaced all of the spreader boots. He also replaced all of the lifelines that were at end of life.

2022-04-01

Boat Maintenance

We took our Catalina 320, currently named Skål, out for our first time away from the dock since the sea trial. We will get to that in another post, but we've been busy for the last six weeks. We have had engine maintenance, sail maintenance, and other general work to get her ready to go. Our first issue was getting her insured. We went back to BoatUS, who has been our insurance company on Fantasia. They looked at the survey that had been done, picked what seems like an arbitrary four things that had to be fixed before they would insure the boat. Not only did we have to fix them, but we had to have our surveyor come back out and verify they were fixed. So we did.

Out of the things on the survey, they decided that we had to replace the exhaust hose, fix the bilge pump hose, stop a really minor deck leak of the port mid-ship stanchion, and put some chafe guard on some engine water hoses. Other things like a dead carbon monoxide detector didn't matter to them, which I'll come back to in a bit. The exhaust hose was at end of life, but really didn't need replacing before insuring the boat. But fine. We got 20 feet of exhaust hose (we needed maybe 12) and replaced it. We rebedded the stanchion, which was relatively easy except getting access to the nuts inside the boat was tricky. The chafe guard on the hoses took minutes to fix. The bilge pump hose had a minor split that needed repair, which we did. We would have got to all of these, but probably with a different priority if the underwriters hadn't chosen the priority for us. We could have chosen a different insurance company, but we were going to fix them anyway.

The mainsail was missing four of the slugs that hold it to the mast. So we took it in to Doyle Sails and had them fix that, as well as add a second reefing point on the sail. We also had the Dutchman system on the sail repaired as the filaments were broken. The gate that allows you to remove the mailsail from the mast was installed with non-stainless screws, which had rusted and caused their heads to break off. We had to drill them out and re-tap them. Do not use hardware that isn't stainless on a sailboat!

The Perkins M30 engine the boat comes with was running rough, so we had Darrel at Fathom Marine Services do some overdue maintenance. The M30 has a notorious problem that the exhaust elbow part gets clogged with carbonization. Sure enough, it was bad enough that the part had to be scrapped and a new one ordered from England and expedited out. (If you have an M30, get the elbow checked!) We got all the fluids changed, the timing on the engine fixed, and the idle changed, replaced the impeller, etc.

We had Kent from North Sound Rigging come out and do a rigging inspection. He mainly noted that our standing rigging and lifelines are at end of life. You are supposed to replace the standing rigging every ten years, and ours are 28 years old. Still, there was nothing that looked terribly wrong, so we are scheduling that for this fall. The lifelines, though, will get replaced earlier. He also noted that the shroud boots needed replacing, two cam cleats on the traveler was dead (we had already noted that and replaced them with new Harken cleats before he gave us the report), and a few other items. Basically we need standard rigging maintenance, but nothing that said don't sail.

We could have had the rigging inspection required before buying the boat, but we didn't feel that anything he would have to say would change what we decided on the boat, just what items were on the list.

We replaced a bunch of outdated or dead safety stuff on the boat. The flares were from the 1990s. The fire extinguishers were old, too, and certainly don't meet the new Coast Guard specs that come into play this month. We replaced those. We replaced the dead carbon monoxide detector in the salon with a new Kidde smoke and carbon monoxide detector. We added a second one to the aft cabin where there had never been one. We replaced the dead GFCI AC sockets. Why weren't these things weren't important to the underwriters?

We replaced all of the interior incandescent lights with new LED lights that are both brighter and use less battery. We added labels to the electrical panel. We added a wire tie to the macerator to make it so it can't be opened in the Salish Sea. We fixed the handle on the head door. We replaced the wing nuts on the battery terminals with regular nuts, and found one of the battery terminals had cracked, so replaced that. We topped off the water in the batteries. We added Froli bed springs to the bed in the aft cabin. We replaced the cover to where the emergency tiller attaches because the handle was broken.

As noted on the survey, the drain on the propane locker was clogged. This is important because it is the exit point from the boat if the propane tank leaks. You don't want propane on a boat because it tends to go boom! Except you need propane on a boat to run the stove. So you isolate it and make sure that any leaks go overboard rather than sinking into the bilge where a spark causes bad things to happen. A clogged hose leaves propane on the boat. We replaced that hose (43" of 1" hose), also finding that there was a screen placed at the end of the hose to keep bugs out that had been completely clogged with debris. We removed that screen.

We have an Ardic diesel heater on the boat. The unit is in the starboard aft lazerette. This pumps out a ton of heat. Unfortunately, there seems to be a leak in the exhaust, because it caused the brand new carbon monoxide detector to go off at 1 a.m. If we hadn't installed that in the aft cabin, it literally could have killed Sandi. We have since added a third carbon monoxide detector in the lazerette next to the heater. If there is one thing the underwriters should have insisted on was new detectors. We haven't fixed the heater yet, but we aren't running it until we do. Since we are at the marina, we are using an electric heater for now.

None of these things are surprising on a boat. Every boat has a list like this, even brand new boats. (We use Microsoft To Do to maintain our lists, which allows modifying them from any device.) We just are doing all of this stuff at once rather than stretching it out. We learned so much doing work on Fantasia, our Catalina 22, that prepared us for taking on this boat.

2022-03-01

History of Our Catalina 320

Catalina Yachts of Woodland Hills California, started building Catalina 320s for the 1993 model year. Through 2008, they build over 1165 of them. In 2008, they discontinued the model and replaced it with the Catalina 315. The Catalina 320 International Organization has a history of the changes over the year and a pretty complete list of current owners with their names and home ports. From various records that came with the boat, in the closing documents, and a few other places, we have been able to find the history of the boat.

Our Catalina 320, hull #87 was built in October of 1993, as a 1994 model year for WeatherMark, Inc. a Catalina dealer in Buford Georgia. The builder's certificate was issued February 8, 1994. It was purchased by a couple on March 15, 1994 and named Rader's Folly II. Unfortunately, the husband of the couple passed away soon after and the boat was put up for sale.

On August 16, 1994, Rear Admiral Ronald P. Morse of the U.S. Navy Dental Corp bought the boat, which closed by September 17th. The boat was renamed Skål, the Scandinavian toast that means "cheers". The Coast Guard records can't do non-standard letters, so they show the name as SKAL. Admiral Morse sailed her on Chesapeake Bay. When Admiral Morse retired from the Navy in 1995, he moved to the Seattle area and had her trucked across the country.

On August 18, 1997, Skål was sold again, but retained the same name, to a couple in Washington State. Then the records get a little less clear. It appears the one of the owners died in February of 2007 and the boat was transfered again to a couple in Friday Harbor. The boat had a title issued by the State of Washington on December 5, 2008.

On January 16, 2022, we took a look at Skål at Cap Sante Marina in Anacortes. We had actually seen Skål in August when we made our San Juans trip on Fantasia and stopped at Cap Sante. There had been a pending offer from a couple from Hawaii that fell through. After looking at all the systems, we made an offer that evening, which was accepted. The sale closed on February 18, 2022. And that is how we became the fifth owner of Catalina 320 Hull #87.

2022-02-18

New Boat! This site is now the Catalina 320 Yacht's Log

Today, we received title on our new boat.

After 7 years of sailing our beloved Catalina 22', Fantasia, primarily in Lake Washington and Seattle's Puget Sound area, we ventured north to the beautiful San Juan Islands last August for the first time for a weeklong sailing adventure. "Cruising" like this is a very different experience from our day sails and evening sunset cruises. We decided pretty quickly that although we love our little Catalina 22' swing keel, we really needed a little more cabin space in which to spend days or even weeks anchored out exploring the waters of Puget sound and the greater Salish Sea. The nature of our work has changed, as it has for so many of us, in the past couple of years, and we now work primarily remotely. With this new level of freedom, we began to entertain the idea of working from on board a boat, still in the same general area, but not limited to our home offices. We began thinking about what our next boat would be, and agreed that another Catalina in the 32'-36' range would be a good fit for us and our current needs. We started keeping a watch on the boats coming up for sale in the area and eventually found one that we were both happy with, a 1994 Catalina 320, that we had actually seen last August during our San Juans trip! Originally christened 'Rader's Folly II', she's been known as 'Skål' since Admiral Ronald P. Morse purchased her in Norfolk, VA., in September of 1994. We deliberated, even agonized, over her name quite a bit and ultimately decided that the name 'Skål' wasn't a good fit for us. Her name will be changing once again, but that will be revealed another day.

We are not selling Fantasia, our Catalina 22 at the present time. We have poured so much time, effort, and money into her that we feel that selling her is just a waste. She can sit on the trailer in the driveway until we find a new home for her, perhaps with one of our young adult kids once they are ready to take her on for creating their own sailing memories.

Purchasing a Catalina 320 was an entirely different experience from purchasing our Catalina 22. With a small trailer sailor, you're likely to purchase with a walk around, a handshake, signing some paperwork and handing over some cash at a dining table. This purchase was much more like a home purchase with seller and buyer's brokers, a formal written offer, sale contingencies, a written offer acceptance, formal inspections (in boat terms, these are the survey, haul out, and sea trial), and an escrow/title company in the middle of it all. If financing your purchase, you'd also have a bank and loan documents wrapped into the process as well. As Skål was moored about a 90 minute drive from us in Anacortes, WA., we met with our buyer's broker to look at another local Catalina 320 which was already under contract, just to be able to sit on board to confirm if the size and layout 'felt' right for us. A couple of days later, we made the drive up to see Skål and spent the next few hours crawling all over her, peeking in every locker and bilge space. Overall, she was in pretty good shape for a 28 year old boat, but had plenty of opportunity for us to make her our own with some TLC and a new list of boat projects. We've joked at times that it's possible we're as addicted to sailboat projects as we are to sailing itself. But I think it's just that we get such a sense of accomplishment and pride in ownership from the maintenance and upgrade projects we take on.

So what's on the agenda for us and the new boat now?

First up we have a few critical maintenance items to take care of. We pulled the main sail off the boat and sent it off to a sail loft to have all the slugs replaced. Four of them, we knew from our initial inspection, were already broken, and the others were likely also brittle and headed towards failure. Best to just have them all done and not have to worry about them. We decided to have a 2nd reef point added to the main and to also have her Dutchman flaking system filaments replaced. This will make dropping the sail much easier to manage for us at a fraction of the cost of adding a new stack pack.

Inside, our surveyor had noticed evidence of a small freshwater deck leak from one of the stanchions. Rebedding that is a priority before it can do any damage to the deck or the interior. Next up, installing some new smoke and CO detectors, fire extinguishers, and replacing a couple of non-working interior lights. We'll also be replacing two aging engine hoses and a leaky bilge hose. The other 50+ items already on our to-do list are relatively minor things like cleaning the Magma grill, updating labels on the electrical panel, replacing wire nuts with proper electical connectors, calibrating the knotmeter (which disagreed with our GPS devices during our sea trial), fixing/replacing a cam cleat, and servicing the winches. We're super excited to be embarking on a new journey with new things to learn.

2021-09-12

Servicing the Arco 6 Winches

Our Catalina 22 came with Arco 6 winches. Once a year your winches should be cleaned and maintained. Our haven't been serviced since we got the boat seven years ago and who knows how long before that, so it was well past time. While ours are Arco 6, the info below applies to virtually any single speed winches, for example Lewmar winches.

Arco 6 Winch

A sailboat winch is actually a relatively simple device. It is essentially a ratcheted drum that only turns clockwise. It provides mechanical advantage when pulling on lines. If more advantage is needed, a winch handle can be attached to the top which makes a bigger lever giving more mechanical advantage.

The winch works by having a cast outer drum that has serrations on the inner side, and an inner main shaft that the upper part turns. Set into the inner main shaft are a set of pawls. The pawls are pivoting metal blocks that are moved by springs. The springs push the pawls into the serrations in the drum. Because the pawls are mounted at an angle, as long at the winch is turned clockwise, the serrations will push the pawls out of the way. But if the winch tries to turn counter-clockwise, the pawls will be pushed by the springs into the serrations and stop the winch from moving.

To service the winch, I followed the directions on this web site:  https://m17-375.com/2010/04/12/winch-maintenance-arco-6-style-winch/. Another web site worth looking at is the Stingy Sailor's. Also Emily & Clark's Adventure has a nice video on winch maintenance for a two-speed winch. The basic idea is you open the winch, clean out any gunk that has accumulated, replace any spring that are no longer working, grease it all back up, and put it back together. If you are working over water, it is highly recommended to make a box that goes around the winch to keep any parts from jumping into the water.

Winch Box

I started by removing the spring ring at the top that holds the winch together with two small flat blade screwdrivers. I noticed that there were springs that were sticking out, obviously not right. After removing these springs with needle nose pliers, I proceeded to remove the pawls. There are two levels to the winch: lower pawls that are attached to the part of the shaft that doesn't spin, and upper pawls that are attached to the part that does spin. On the Arco 6, there are a total of four pawls, but on a bigger winch there may be more. There are two half disks that fit between the upper pawls and the lower pawls. With the outer shell removed, these simply slide out.

The winch is designed to be serviced.There is a small indent in the upper part of the winch. By spinning the indent above the lower pawls, they can be slid up and removed. This then makes the upper pawls removable. By sliding them into the space where the lower pawls were, they can then be removed the same way. To remove the pawls, they must be pushed in, or the angle won't be right. After removing the pawls, all the parts should be cleaned in a solvent like turpentine or mineral spirits. Then the whole thing should be put back together.

Items needed to service winch, plus lots and lots of paper towels.

And that is where we ran into the first hitch. The springs on the Arco 6 were mangled and wouldn't stay on the pawls. These springs and pawls were not designed well, with little loops of spring that go over the ends of the pawls to hold them in place but pop out easily. I couldn't find replacement springs of the same design. However, the pawls of the Arco 6 can be replaced with Lewmar small winch pawls. The Lewmar pawls are a little shorter, but work just fine. The springs mount in the middle rather than the ends. Unfortunately, the kit comes with six pawls, so it will take two kits to service both winches, leaving four extra pawls. After replacing the pawls with the new pawls, the springs can be serviced in the future for almost nothing (I found one place that sells them for 15 cents each), and extra springs come with the Lewmar pawls.

Pawl from the Arco 6

I greased the movable parts and parts that come into contact with each other with Harken winch grease. The tube says to not grease the pawls. After reversing the disassembly procedure with the new pawls, the winch went back together nicely and give very nice satisfying clicks when rotating.

Cleaned winch with Lewmar pawls

2021-08-30

List of Essential Tools and Supplies for a Boat

Having worked on our boat for the last seven years, we have found that there are some essential tools that you will need to have on your boat. We created a page with the list and links to where you can buy these items. You can find it here: https://www.yachtslog.com/p/essential-tools-and-supplies-for-boat.html

2021-08-28

A Trip to the San Juans

We have wanted to take our little boat up to the San Juan islands for years. Having spent exactly one night on the boat before, this was a pretty big step for us. Our friends Boris and Mayli were planning a trip up there for late August, and asked if we wanted to join them. There was so much to do to get ready.

Besides provisioning the boat, we needed a dinghy. We bought one very cheap dinghy from Craigslist. It had leaks that we wouldn't be able to repair in time. So we bought another dinghy, a West Marine RU-250, along with a Mercury Marine 2.5 hp outboard. To inflate it, we got a electric air pump and EXP Pro 48 Lithium Ion battery pack. (The battery pack is useful for a lot of things.) To tow it, we rigged a harness that distributes the pull between the rings on the front with New England Ropes Dinghy Tow Rope.

Our RU-250 and Mercury Marine outboard.

We also needed a way to charge the batteries while at anchor. We bought a gas-powered generator. It provides a 20 amp socket that our shore power cable plugs directly into. And speaking of anchors, our little 8 pound Danforth wasn't going to keep us feeling comfortable, so we bought a Rocna 10 (10 kg, 22 lbs) anchor, 22 feet of chain, 250 feet of 3/8" line and a swivel. We also got an anchor ball. We got a radar reflector, just in case we ran into fog, so we wouldn't get run down in our tiny boat (fortunately, no fog on the trip).

Headed out, towing the dinghy.

We got everything on the boat. It got to be 2 p.m. August 22nd 2021. We debated whether it was too late to head out, but we had a schedule to meet (always a problem on a boat)! Left dock and headed out. We arrived at Langley (South Whidbey Harbor) on Whidbey Island around dusk.

We used to VHF to call into Langley for a slip, but there was no answer. The telephone number said to call on the VHF. However, coming into the marina there was a sign on a slip saying "open", so we pulled right in and tied up. We paid at the box, and got the bathroom code number from another mariner. All good! We were entertained by the seals on the dock all night that would bark at us if we passed too close, but wouldn't budge.

The next morning, we headed out. We tried to put up sails, but there wasn't enough wind, and resorted back to motoring. Up through the Swinomish channel, past La Conner, and into Anacortes Cap Sante Marina. Called on the VHF and they assigned us a 50' slip for our Catalina 22. Not sure if they misheard our LOA! It was entertaining to be next to boats that probably have cleats that cost more than our boat.

The next morning we headed out. Crossing through Guemes channel with a strong tide in our favor, we hit 9.6 knots, I think a record for a Catalina 22! We crossed Rosario Strait with no problems, around the north end of Lopez Island, and into Friday Harbor marina on San Juan island. Soon after arriving, Boris and Mayli pulled in as well.

Proof that a Catalina 22 can go 9.6 knots.

The next morning, we got showers at the Marina, refueled the five gallons of gas we'd used since the start of the trip, and headed out to Westcott Bay near the English camp of the Pig War. We sailed a bit on the way, which was gloriously good sailing. In Westcott Bay, we anchored for the first time ever! Dropped the Rocna anchor, tied the rode to the forward cleat, put it in reverse and done. That evening we set the anchor alarm and it didn't budge. Boris sent up the drone, and caught this footage of us at anchor.

Fantasia at Westcott Bay (those are seat cushions drying on top)

We took our dinghy for a nice test ride out to the English Camp. In 1859, the United States and England had a cold war on San Juan island contesting the border between the U.S. and Canada. Both claimed the San Juan islands. Eventually, a decision was made by a neutral third party that the San Juan islands were owned by the United States and the hostilities ended with the only casualty of the war being a pig, thus the name "The Pig War".

The next day Sandi cooked pancakes on the deck for breakfast. In the afternoon, we took the dinghy around to Roche Harbor, visiting the town and the sculpture park.

Mayli at the sculpture park.

The next morning, we topped off the batteries with the generator, and headed back to Anacortes, passing between Orcas Island and Shaw Island. It was pouring rain at times. As we crossed Rosario Strait, Greg checked the bilge and discovered water, which was disconcerting as we have never had any real water in the bilge. Water seemed to be seeping in aft of the keel trough. We got to Cap Sante Marina and Greg raced over to West Marine to get some epoxy before they closed. After laying down some epoxy which slowed the ingress, we debated what to do, as sailing for another day or two with an unknown source of water seemed inadvisable.

After thinking about it, we decided to have Connie come up and get Sandi, go down and get the trailer, and bring it back. Greg stayed with boat overnight during which the water leak seem to subside. The next morning, Sandi drove up with the trailer along with Devon and Taylor. We moved the boat over to the boat lift and took down the mast. The guys at the lift took the boat out and dropped it on the trailer. And we drove it back to Kenmore. Thus ending our trip.

While this ended on a downbeat, we considered this trip a success!

Fantasia safely parked at the end of the trip.
Our route. (Open Street Maps)